Practice Settings
- Get Started
- Release Notes
- Triggers
- Patient Channel
- Troubleshooting and FAQ
- Patient Facesheet
- Technical Specifications
- Insights & Analytics
- Inbox
- Conversation Flows
- Campaigns
- Lines & Resources Requests
- Lines, Events, Resources
- SMS Basics
- Automations
- Referrals
- AI Agents
- Add-Ons
- Users and Groups
- Platform Settings and Configuration
- Self-Rescheduling
- Recalls
- Marketplace
- Artera Harmony Federal Edition
Table of Contents
Accessing Practice SettingsPractice HoursAfter-Hours Auto-ResponseAfter-Hours Response Trigger ConditionsAppointment Status OptionsChannel Opening Appointment StatusesReferral Visibility OptionsSecure Message CopyReschedule with Artera Success and Failure MessageInclude Timezone in Smart PhrasesCustomize {eventConfirmText} Smart Phrase TextArtera has two separate settings menus, Practice Settings and Enterprise Settings, allowing you to configure your Practices and Enterprise to fit your needs:
- Practice Settings: These settings are located within the Practice Settings menu and only apply to the Practice indicated at the top of the page. These settings are covered in this article. NOTE: Practice Settings are accessible by Manager and Enterprise Users.
- Default Settings: These settings are found in your Enterprise Settings menu and apply to all Practices within the Enterprise. NOTE: Enterprise Settings are only accessible by Enterprise Users. Click here to review Default Settings.
Accessing Practice Settings
-
Select Settings in the Navigation Bar.

-
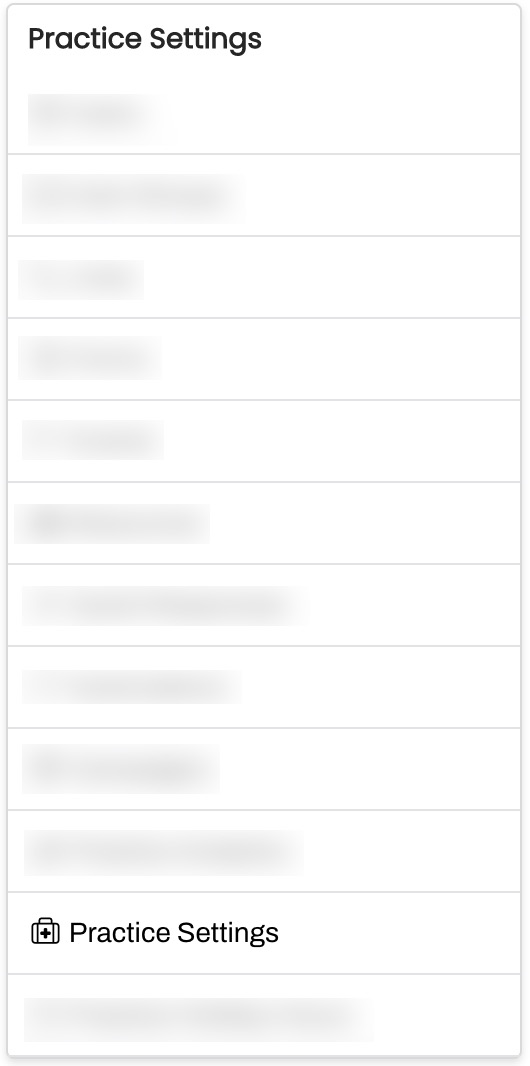
From the Practice Settings menu, choose Practice Settings.
Practice Setting Explanations
Practice Hours
Establish your office hours in Artera to reflect when your Practice is open. This indicates the days/times that a patient can expect a response. This is helpful when all lines within the Practice follow the same schedule. You can also automatically send After-Hours Auto-Responses to any messages received from patients outside of your Practice Hours. Click here to learn more about how business days can impact Triggers. 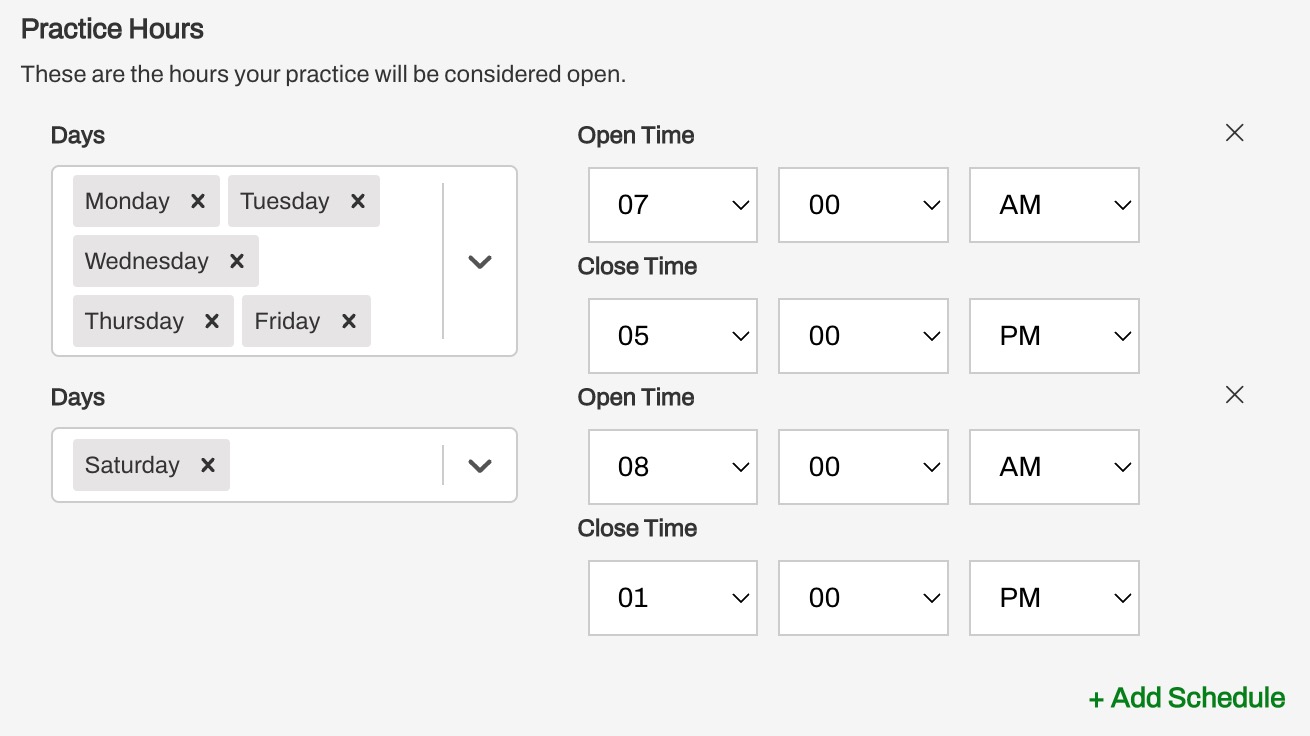
- Click Set Your Practice Hours.
- If you have multiple schedules, start by selecting the days your Practice is open at the same time. For instance, Monday-Friday from 7:00 AM to 5:00 PM. Make sure to select each day (do not worry if the days appear out of order).
- For your next schedule, click + Add Schedule. Perhaps you are also open on Saturdays from 8:00 AM - 1:00 PM.
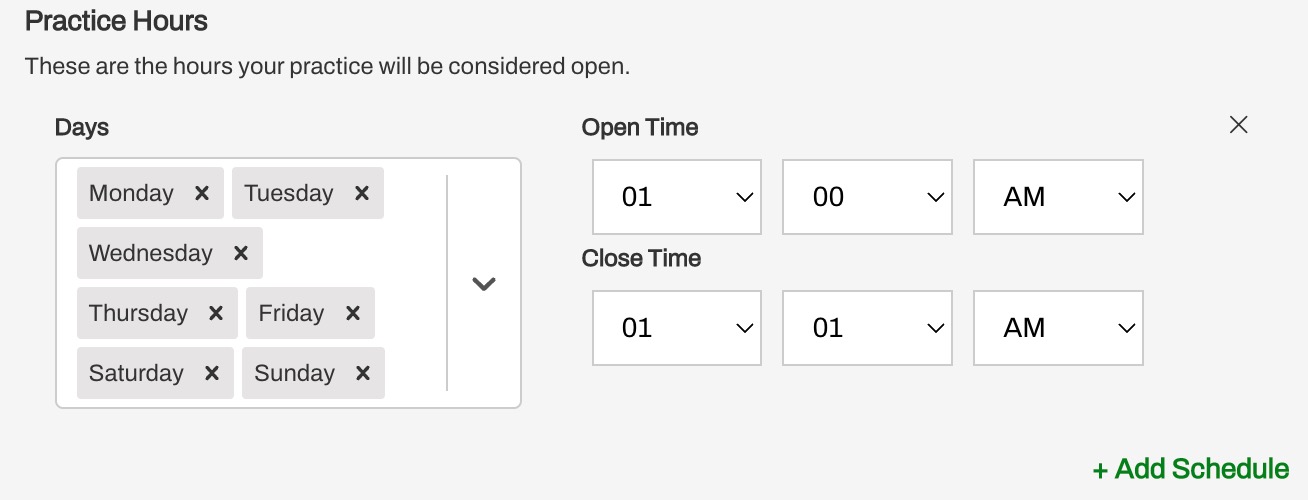
NOTE: If your Practice does not use Conversational Messaging, you can set your Practice Hours with Open Time 1:00 AM to Close Time 1:01 AM for the days your Practice is considered open. For example, Monday through Friday, 1:00 AM to 1:01 AM. This way, the After-Hours Auto-Response is always sent to patients who text in to the Practice.
After-Hours Auto-Response
Customize your After-Hours Auto-Response to reply to patients who text into the Practice outside of the Practice Hours. If your Practice does not use Conversational Messaging, you can set your After-Hours Auto-Response to communicate with patients that the line is not being monitored for inbound messages from patients.
To maintain a satisfactory patient experience, Artera limits After-Hours Auto-Responses sent to patients. The After-Hours Auto-Response has a 10-minute "cooldown" period. Once a patient receives the After-Hours Auto-Response, they will not receive it again for subsequent messages they send in until 10 minutes have passed.
NOTE: The After-Hours Auto-Response will not be sent as an email to patients who email your Practice outside of its operating hours.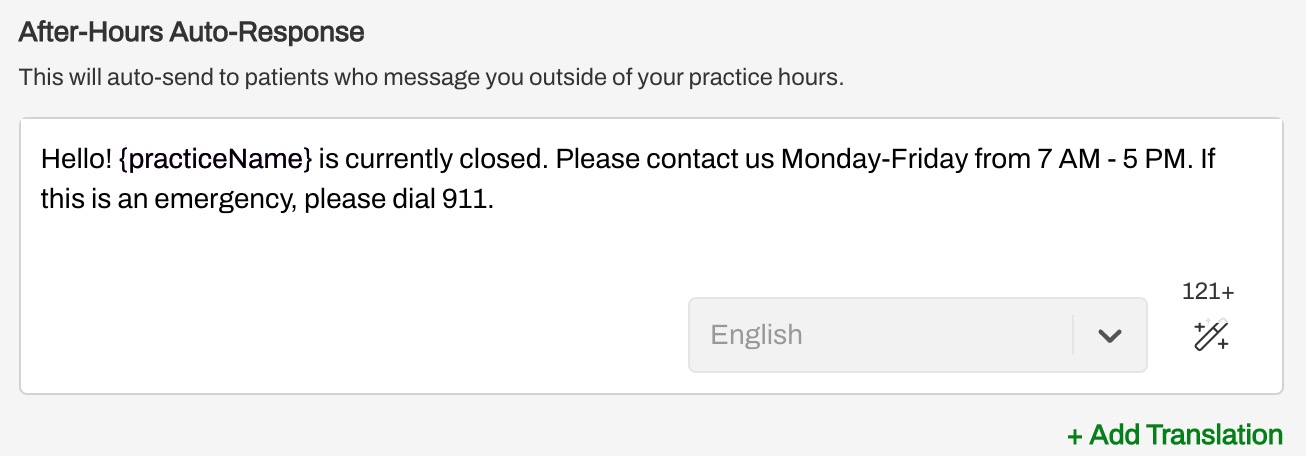
-
Enter the message you want patients to receive when they text in during after-hours.
NOTE: Conversation Flows Smart Phrases can be placed into this field to trigger a Conversation Flow. Click here to learn more. - Use Smart Phrases to customize the After-Hours Auto-Response.
- Add Translations to communicate with a multi-lingual patient population. Translations are only impactful when you have established Language Preferences in your EMR.
NOTE: If a patient triggers an Inbound Message Trigger (configured to send a response to the patient) during your Practice's after-hours, the Inbound Message will be sent to the patient instead of the After-Hours Auto-Response.
After-Hours Response Trigger Conditions
In some situations, an After-Hours Auto-Response is not necessary and Artera is configured to prevent unnecessary outbound messages. If the patient sends an emoji, an image, or a text message that is fewer than three characters long, the After-Hours Auto-Response will not be sent.
Additionally, if the patient sends a message containing any of the words below that is fewer than 30 characters, the After-Hours Auto-Response will not be sent:
Thank you, Thanks, Thx, ok, okay, No, N, Cancel, confirm, confirmed, yes, Y, reschedule, S, Si, Voy a ir, Reprogram, Cambiar.
This prevents the patient from receiving a message if they were confirming their appointment or simply saying "thank you." However, if a patient's text contains one of the keywords above and contains a question mark "?", the After-Hours Auto-Response will send. This ensures the patient knows their question will not be answered outside of Practice Hours but that it was received.
Example Scenarios
Appointment Status Options
Select which Appointment Statuses the patient can choose from. Most commonly, customers allow patients to cancel or confirm their appointments. However, you can also allow patients to choose reschedule, depending on your clinic needs.
NOTE: This can also be set at the Default-level using Default Settings. If this setting is left blank for your Practice, then the Practice will default to the configuration used for this setting at the Default-level.

Channel Opening Appointment Statuses
Choose which appointment responses will re-open the Patient Channel for users to address. The recommended settings are different depending on how your scheduling integration is configured. Selections here will override the Channel Opening Appointment Statuses Default Setting. You do not need to make any selection here and can use the default, if desired.

- For customers who do not send the Appointment Status from Artera to their EMR, we recommend choosing at least "Confirmed" and "Cancelled" from the drop-down. This ensures the staff working the Inbox can update the schedule in the EMR with the patient response.
-
For customers who send the Appointment Status from Artera to their EMR, we recommend selecting "None" for this setting at the Default-level. Since the appointment is automatically updated in the EMR based on the patient's response in Artera, there is no reason to alert your staff.
NOTE: Selecting "None" for this setting at the Practice-level does not mean that no appointment statuses will open Patient Channels. Instead, it means this Practice-level setting will follow what is configured for this setting at the Default-level. Click here to learn more about Default Settings.
Referral Visibility Options
Indicate which options you would like to see in the Patient Facesheet. This is only relevant for customers who have implemented Artera's Referrals workflow.
NOTE: This will override the Referral Visibility Options Default Setting. You do not need to make any selection here and can use the default, if desired. 
Secure Message Copy
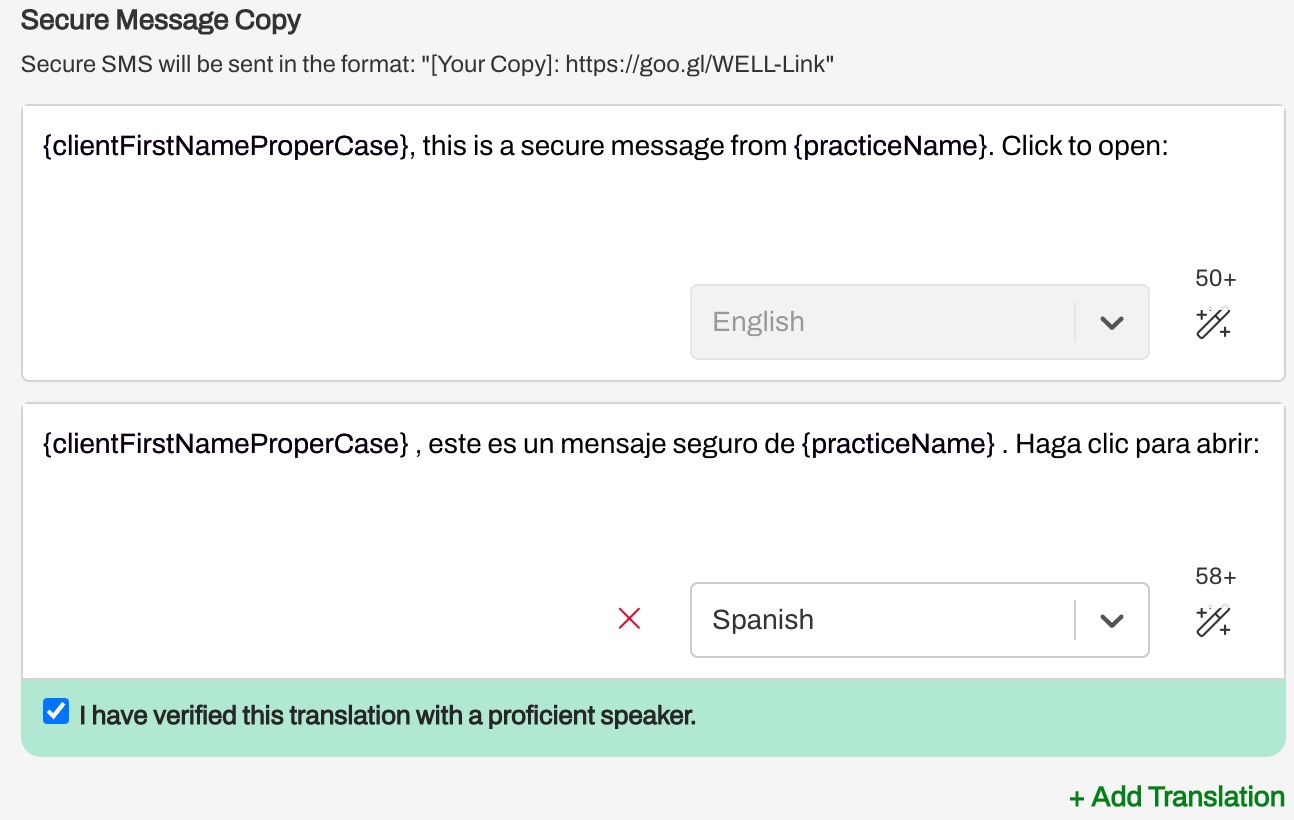
Update the text for Secure Messages sent to your patients from this Practice. Anything entered here will override the Secure Message Copy Default Setting. You do not need to make any updates here if you would like to use the default text.
If you would like to customize the Secure Message Copy for your Practice, we recommend including the {clientFirstNameProperCase} Smart Phrase to ensure that the individual enters the correct identifying information for patients who share the same phone number (i.e. parent and child). You can also add translations to support patient language preferences.
Reschedule with Artera Success and Failure Message
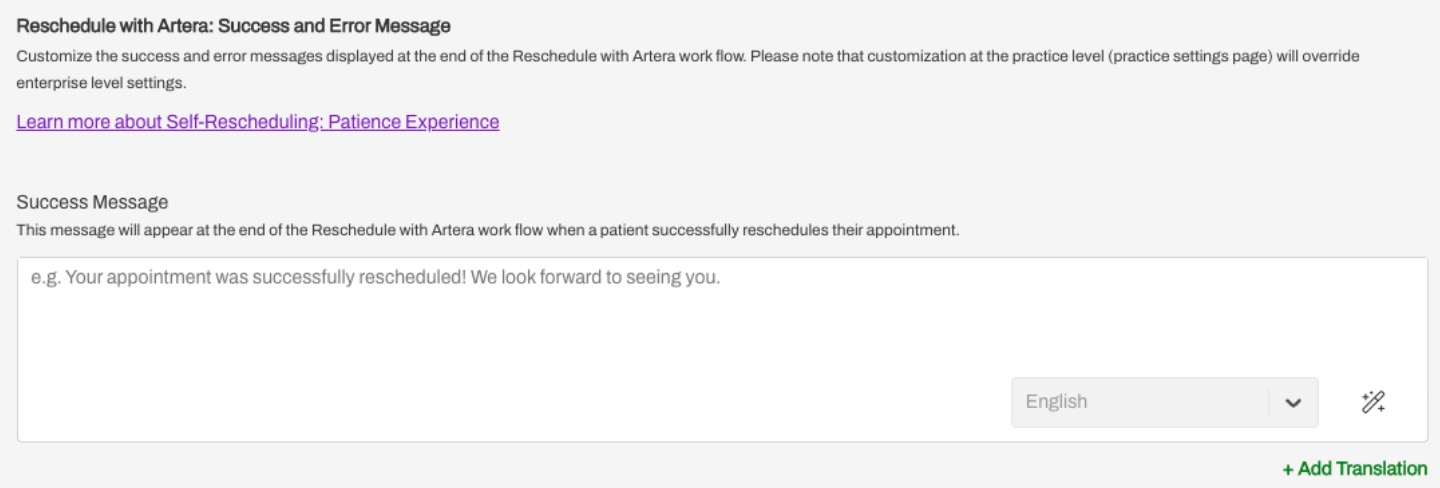
The Reschedule with Artera workflow allows you to customize the message that patients receive when they successfully reschedule their appointment or when they encounter an unresolvable error after attempting to reschedule. If supported by your integration, you can also add translations to support patient language preferences. Click here to learn more about customizing these messages for your Practice.
Success Message:
Error Message:

Include Timezone in Smart Phrases
When enabled, this setting will incorporate your Practice's timezone within any outbound message that includes a Smart Phrase that references time. Those Smart Phrases are: {eventDateAtTime}, {eventDateAtTimeShort}, {eventArrivalTime}, {eventArrivalTime15}, {eventArrivalTimeXX}, {eventCreatedAtDateAtTime}, {referralCreatedAtDateAtTime}, {apptDateAtTimeShort}, {eventStartTime30}, and {eventStartTime60}. Click here to learn more about Smart Phrases.

Customize {eventConfirmText} Smart Phrase Text
Configure the {eventConfirmText} Smart Phrase to match your Practice's needs. Remember, this is included as part of Artera's Leading Practice Appointment Confirmation workflow. You can add "R" for Reschedule if you enabled the Reschedule option within the Appointment Status Options and Channel Opening Appointment Statuses settings.
NOTE: Customizing this Smart Phrase at the Practice-level will override the Enterprise (Default) customization of this Smart Phrase. If this Smart Phrase is not customized for your Practice, then the Practice will use the template set for the Smart Phrase at the Default-level.
Click here to learn more about customizing this Smart Phrase.
