Enterprise User Groups
- Get Started
- Troubleshooting and FAQ
- Release Notes
- Patient Channel
- Triggers
- Technical Specifications
- Patient Facesheet
- Insights & Analytics
- Conversation Flows
- Campaigns
- SMS Basics
- Inbox
- Lines & Resources Requests
- Lines, Events, Resources
- Referrals
- AI Agents
- Add-Ons
- Users and Groups
- Platform Settings and Configuration
- Self-Rescheduling
- Recalls
- Artera Harmony Federal Edition
- Marketplace
Table of Contents
Create an Enterprise Group Edit or Disable an Enterprise Group Mentioning and AlertsViewing your Internal MentionsMentions ReportingUser Groups and Enterprise Groups allow you to tag groups of users using the Internal Mentions functionality in Patient Channels. These two types of User Groups have slightly different functionality:
This article discusses Enterprise Groups. Click here to learn about User Groups.
Video Tutorial
Create an Enterprise Group
- Navigate to Settings > Enterprise Settings > Enterprise Groups.

- In the upper-right corner of the page, select + Create Enterprise Group.
- Add a Name, Description, Practices, and Members.
-
The name of the Enterprise Group is important as this is what will be used to tag the group in an Internal Mention.
NOTE: Each Enterprise Group must be configured with a unique name.
-
Then, use the Practices drop-down to select the Practice(s) that can mention this Enterprise Group.
NOTE: You must choose at least one Practice or the Enterprise Group will not be available for use.
-
Search for the members (users) that should receive the Internal Mention when the Enterprise Group is tagged. These can be Staff, Manager, or Enterprise Users. The users do not need to have access to the Practice where they are mentioned. Being part of the Enterprise Group temporarily grants the users access to the Patient Channel to resolve the Internal Mention.

-
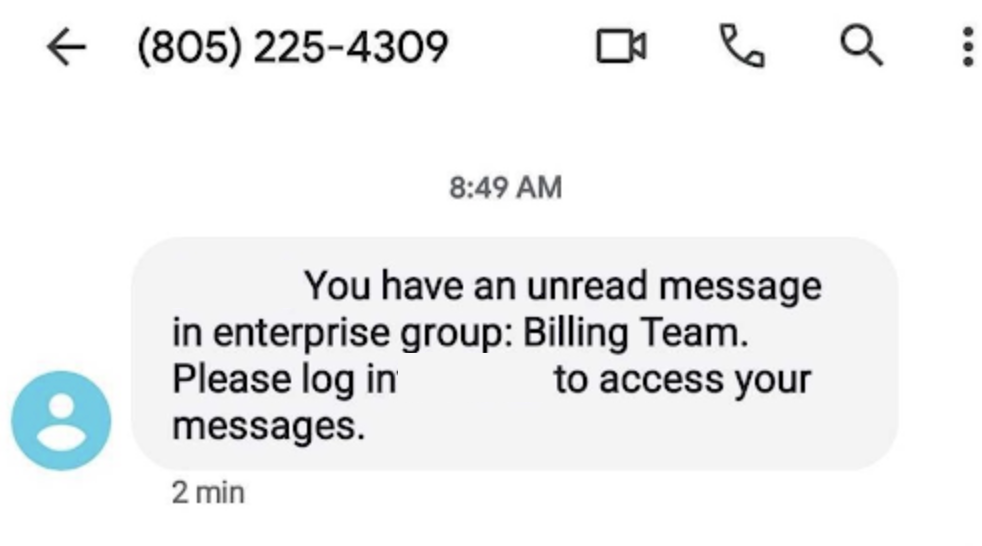
Users can be opted into receiving text or email notifications whenever an Internal Mention for the Enterprise Group is added to a Patient’s Channel. This setting defaults to "None", ensuring no notifications are sent unless manually enabled.
NOTE: Text notifications require a mobile number in the user profile.
- Text Notification
-
Email Notification
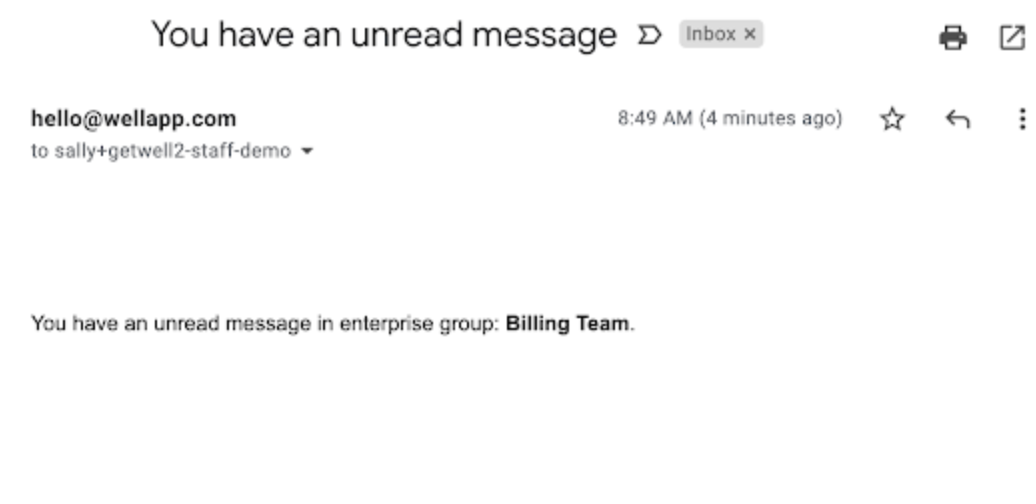
- Text Notification
- When ready, select Save Enterprise Group in the upper-right corner.
Edit or Disable an Enterprise Group

- Edit: You can edit the Enterprise Group's details including name, membership, notification options, and Practice availability. Use the Enterprise Group's (...) Actions menu to select Edit Enterprise Group.
- Disable: You can disable the Enterprise Group to prevent it from being mentioned in a Patient Channel. Use the Enterprise Group's (...) menu to select Disable Enterprise User Group. NOTE: Enterprise Groups cannot be deleted, only disabled.
Mentioning and Alerts
Let's review how to mention Enterprise Groups, resolve Internal Mention alerts, and Internal Mentions Reporting.
Mentioning Enterprise Groups
-
Patient Channel: Enterprise Groups can be mentioned directly from the Patient Channel using the @Mention tab and inserting the "@" symbol followed by the the name of the Enterprise Group.
NOTE: The Enterprise Group is only available for use within the Practice(s) selected during its configuration.
-
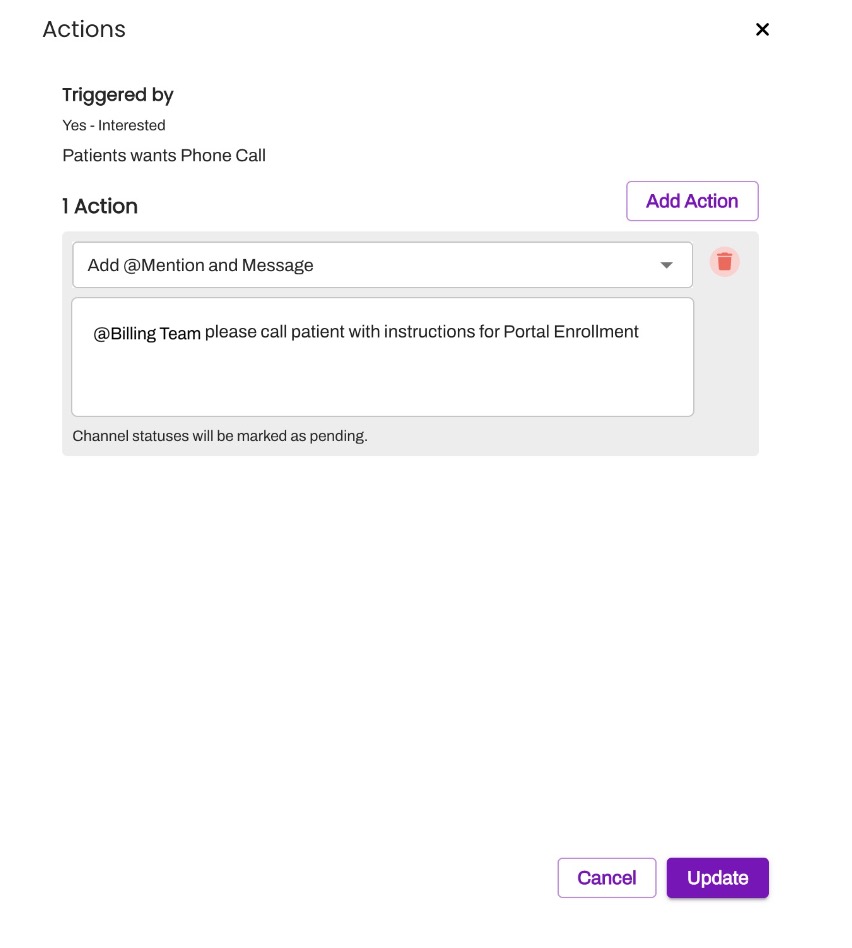
Inbound Message Triggers: Enterprise Groups can also be mentioned as an Action from an Inbound Message Trigger.
NOTE: The Enterprise Group is only available for use within the Practice(s) selected during its configuration.
-
Conversation Flows: You can set up an Add @Mention and Message Action within a Conversation Flow that will mention an Enterprise Group.
Viewing Your Internal Mentions
Access your Internal Mentions from all views within the Inbox.
"Activity" View
The "Activity" view provides a complete overview of your Internal Mentions, both direct (@ Me) and User Group (@ Groups) mentions. It displays your unresolved and resolved Internal Mentions, including a total count of your unresolved Internal Mentions in the navigation bar. This number updates dynamically as new Internal Mentions are created for you or existing ones are resolved.
NOTE: The "Activity" View only displays Internal Mentions where you are the user tagged. It does not display the Internal Mentions that you created for other users. 
By default, the "Activity" view displays your direct, unresolved Internal Mentions in the @ Me tab. This is your immediate to-do list for managing your direct Internal Mentions.

To view your unresolved Enterprise Group mentions, select the @ Groups tab from this view. This displays all Internal Mentions where a User Group you are a member of has been tagged.
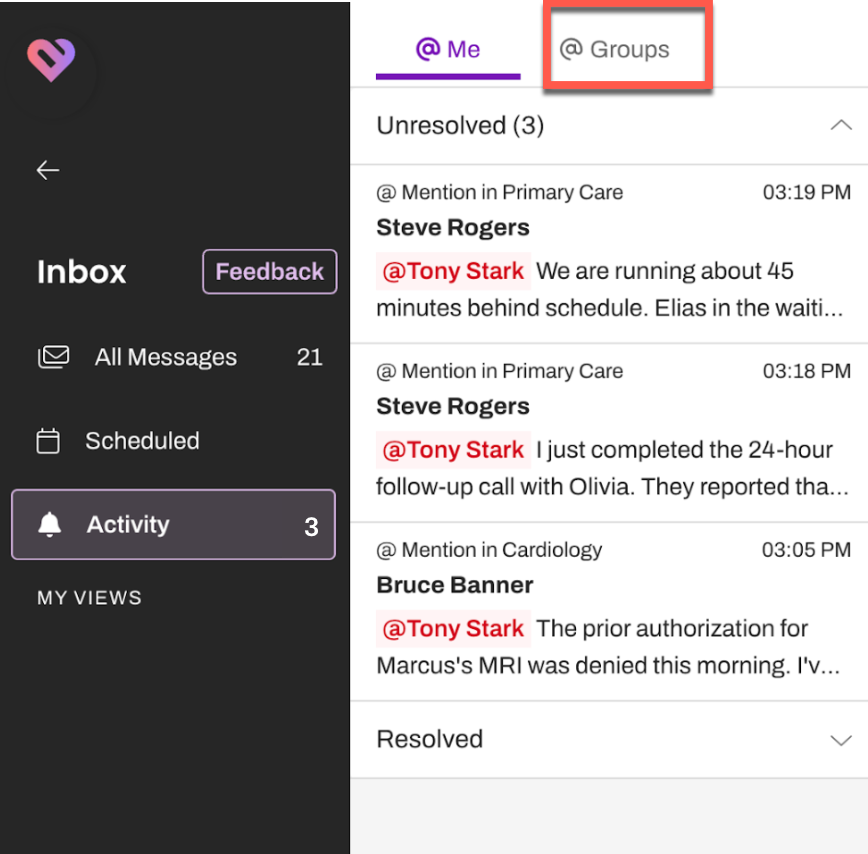
Each Internal Mention card displays the Practice the Internal Mention was added in, the user who created the Internal Mention, the line associated with the Internal Mention, and up to a two-line message preview (if a message was included by the creator of the Internal Mention).

As soon as an Internal Mention is resolved, it will automatically move from the "Unresolved" section to the "Resolved" section in this view.
NOTE: Resolved Internal Mentions display for the past 30 days.
Filtering for Internal Mentions
Use the Filters Panel in the "All Messages" and "Scheduled" views to filter for "@ Internal Mentions".

Once the Internal Mention is worked/resolved, the Enterprise Group member can update the Channel Status to Resolve Mentions. This automatically resolves the alert for all the Enterprise Group's members.
NOTE: Resolving the Internal Mention will not send an alert to the Enterprise Group indicating the task has been completed.

Mentions Reporting
Enterprise Groups can be mentioned from all Practices within an Enterprise that are selected when creating the Enterprise Group. Although the Enterprise Group can contain multiple users, Enterprise Groups are counted as one single user within the context of "Mentions Reporting" in analytics.
Therefore, using Enterprise Groups may impact the accuracy of Mentions reports which track the number of unique senders, as the Enterprise Group itself is one unique sender, regardless of its member count.