Managing Automated Messages
- Get Started
- Release Notes
- Triggers
- Patient Channel
- Troubleshooting and FAQ
- Patient Facesheet
- Technical Specifications
- Insights & Analytics
- Inbox
- Conversation Flows
- Campaigns
- Lines & Resources Requests
- Lines, Events, Resources
- SMS Basics
- Automations
- Referrals
- AI Agents
- Add-Ons
- Users and Groups
- Platform Settings and Configuration
- Self-Rescheduling
- Recalls
- Marketplace
- Artera Harmony Federal Edition
Table of Contents
Review Practice AutomationsPreviewing AutomationsEdit AutomationsPaused and Incomplete AutomationsView Edit HistorySuccessful long-term use of Artera requires occasional Automation maintenance. Keeping your Automations up-to-date not only helps you derive the most value from Artera, but also ensures patients continue to receive the engagement that you have prescribed. As your organization grows, your active Automations may need to be reviewed, edited, paused, or deleted.
Review Practice Automations
The Automation summary provides an overview of what each Automation is designed to achieve. Automations highlighted in grey are Default Automations and those in white are Practice Automations. Some sections of Default Automations will be uneditable from the Practice Automations page.

- Create Automations: Click this button to build a new Practice-specific Automation.
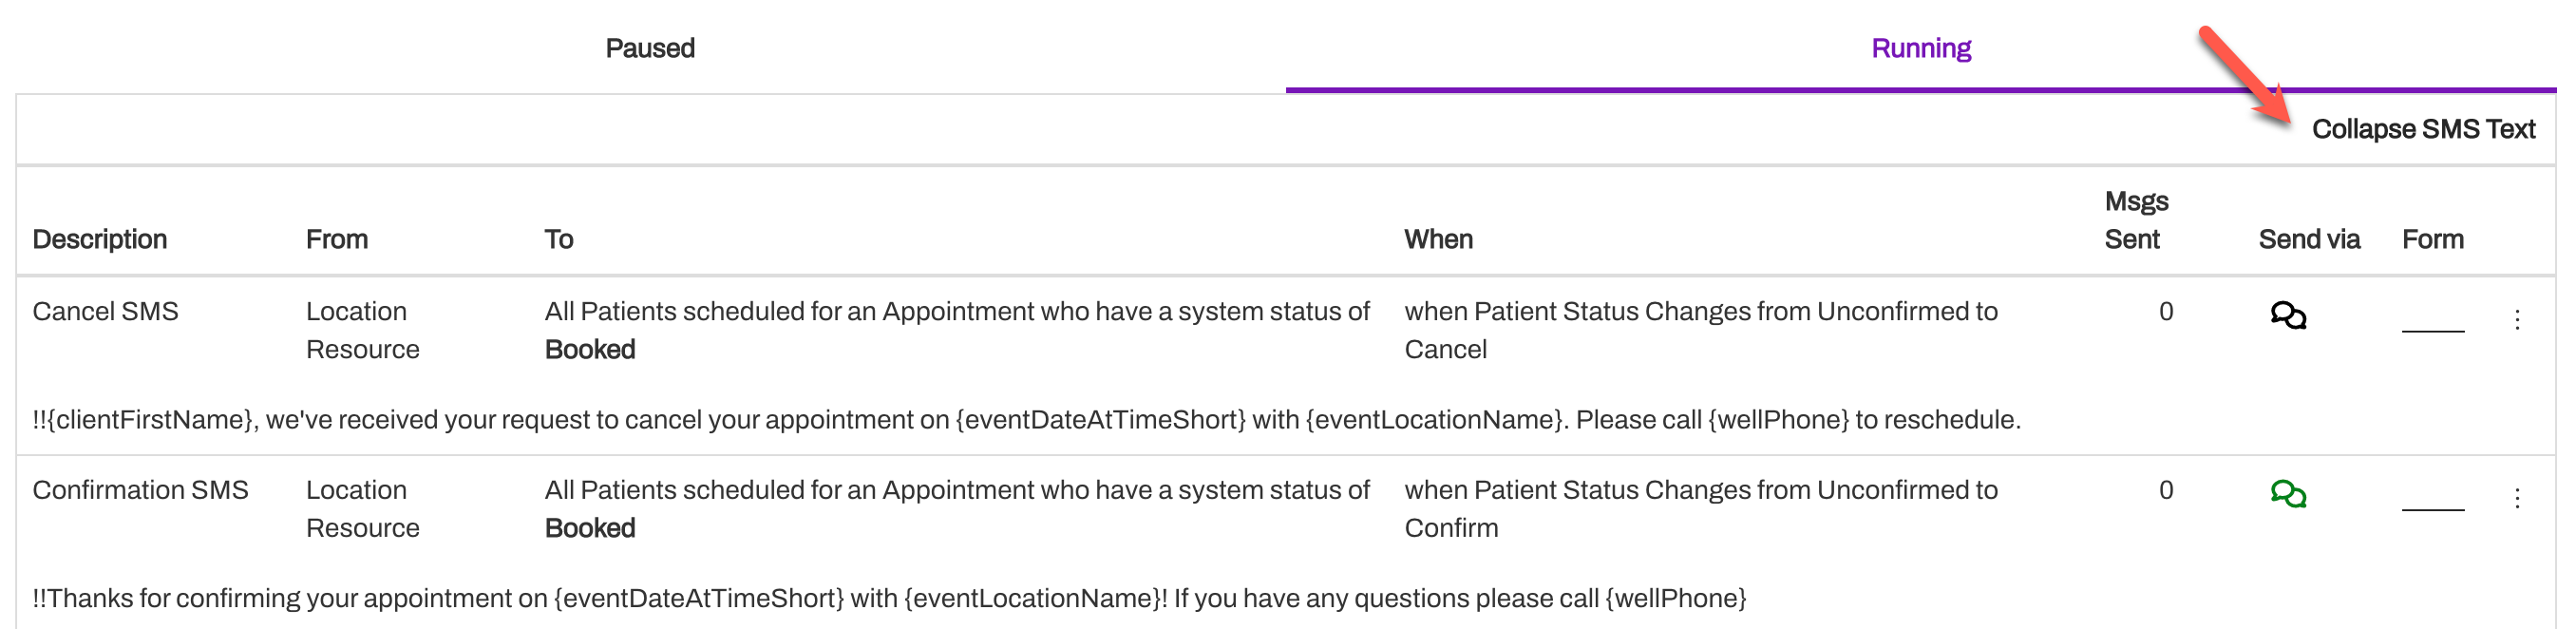
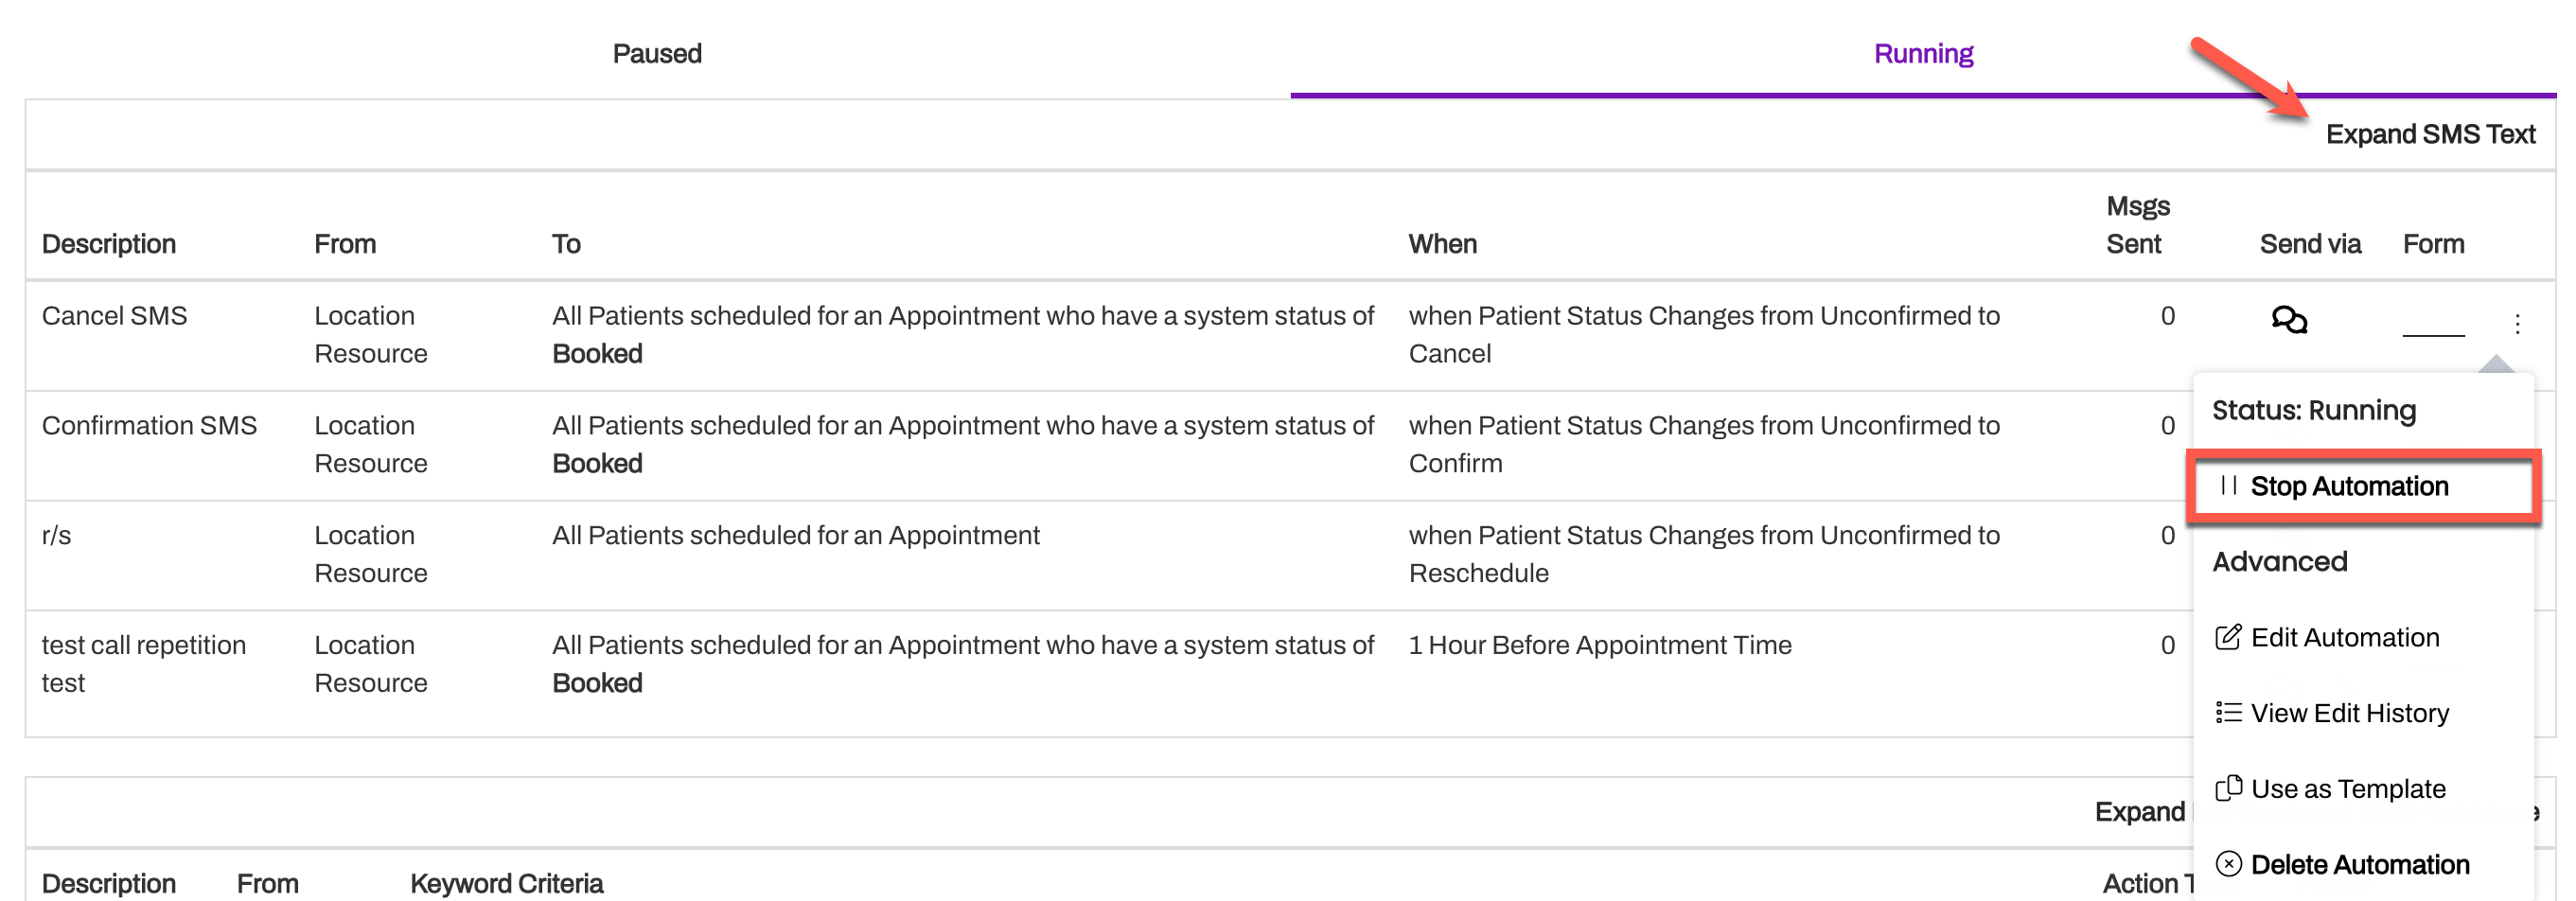
- Paused: This tab contains all Default Automations that have not been configured and all Practice and Default Automations that have not been started or intentionally paused.
- Running: This tab contains all active Automations for the Practice.
- Expand SMS Text: Click this link to preview the text message content of the Automation. This does not display any translations.
- Description: This is established when creating the Automation and serves as the Automation's label/title.
- From: Which Resource type is the Automation is sent from (Location, Provider, etc.).
- To: Displays which Restrictions or Filters have been put into place to determine who will receive the Automation.
- When: This indicates when the Automation will be sent.
- Msgs Sent: This is the number of messages sent by the Automation. This value resets within a 24-hour period of the last automated message that was triggered.
-
Send Via: The icons display which message types the Automation can be sent by—Text, Call, and Email.
-
The color of the SMS icon indicates message length:
- Green: less than 160 characters
- Black: 161+ characters
-
The color of the SMS icon indicates message length:
- Form: The name of the Patient Satisfaction Form attached to the message. Learn more about Patient Satisfaction Forms here.
Avoid Duplicates
If your Practice is experiencing patients receiving duplicate Appointment Confirmation messages, it is possible that there are two running Automations that trigger based on the same variables. Being mindful of the number of automated messages and ensuring that the variables do not overlap can prevent the patient from receiving multiple messages for the same appointment on the same day.
Let's review some common mistakes users make when building Automations:
- Using Provider instead of Location for "From which resource would you like to send this Automated message"?" section. Most organizations have set up their Phone Lines by Location. The Resource selected in the Automation should match the Resource set up on your Phone Line, even if you want to build Provider-specific Automations. Providers can be specified in the "Who would you like to send this to?" section.
- Ensure your Events and Resources have unique names within Artera. This will make it easier to ensure that you are adding the correct filters to the Automation.
- Ensure the Event or Provider is added to the Automation if you filter Automations by Event/Resource.
We recommend minimizing the number of Automations running in your Practice to deliver your desired reminder cadence. If you only need to send a handful of automated messages infrequently, we suggest using Broadcasts or Campaigns instead.
Previewing Automations
From the Practice Automations page, you can easily preview the text message content for all Automations. To preview Phone Calls for the Practice Automations, you will need to edit the Automation.
To preview calls for Default Automations, navigate to Enterprise Settings > Default Automations.
Text
To preview the text message content for all Automations in the Practice, select Expand SMS Text in the top-right corner of the Automations page.
The text message content for each Automation will display below the listed Automation. Select Collapse SMS Text to conceal the text.
 Call
Call
To preview a phone message:
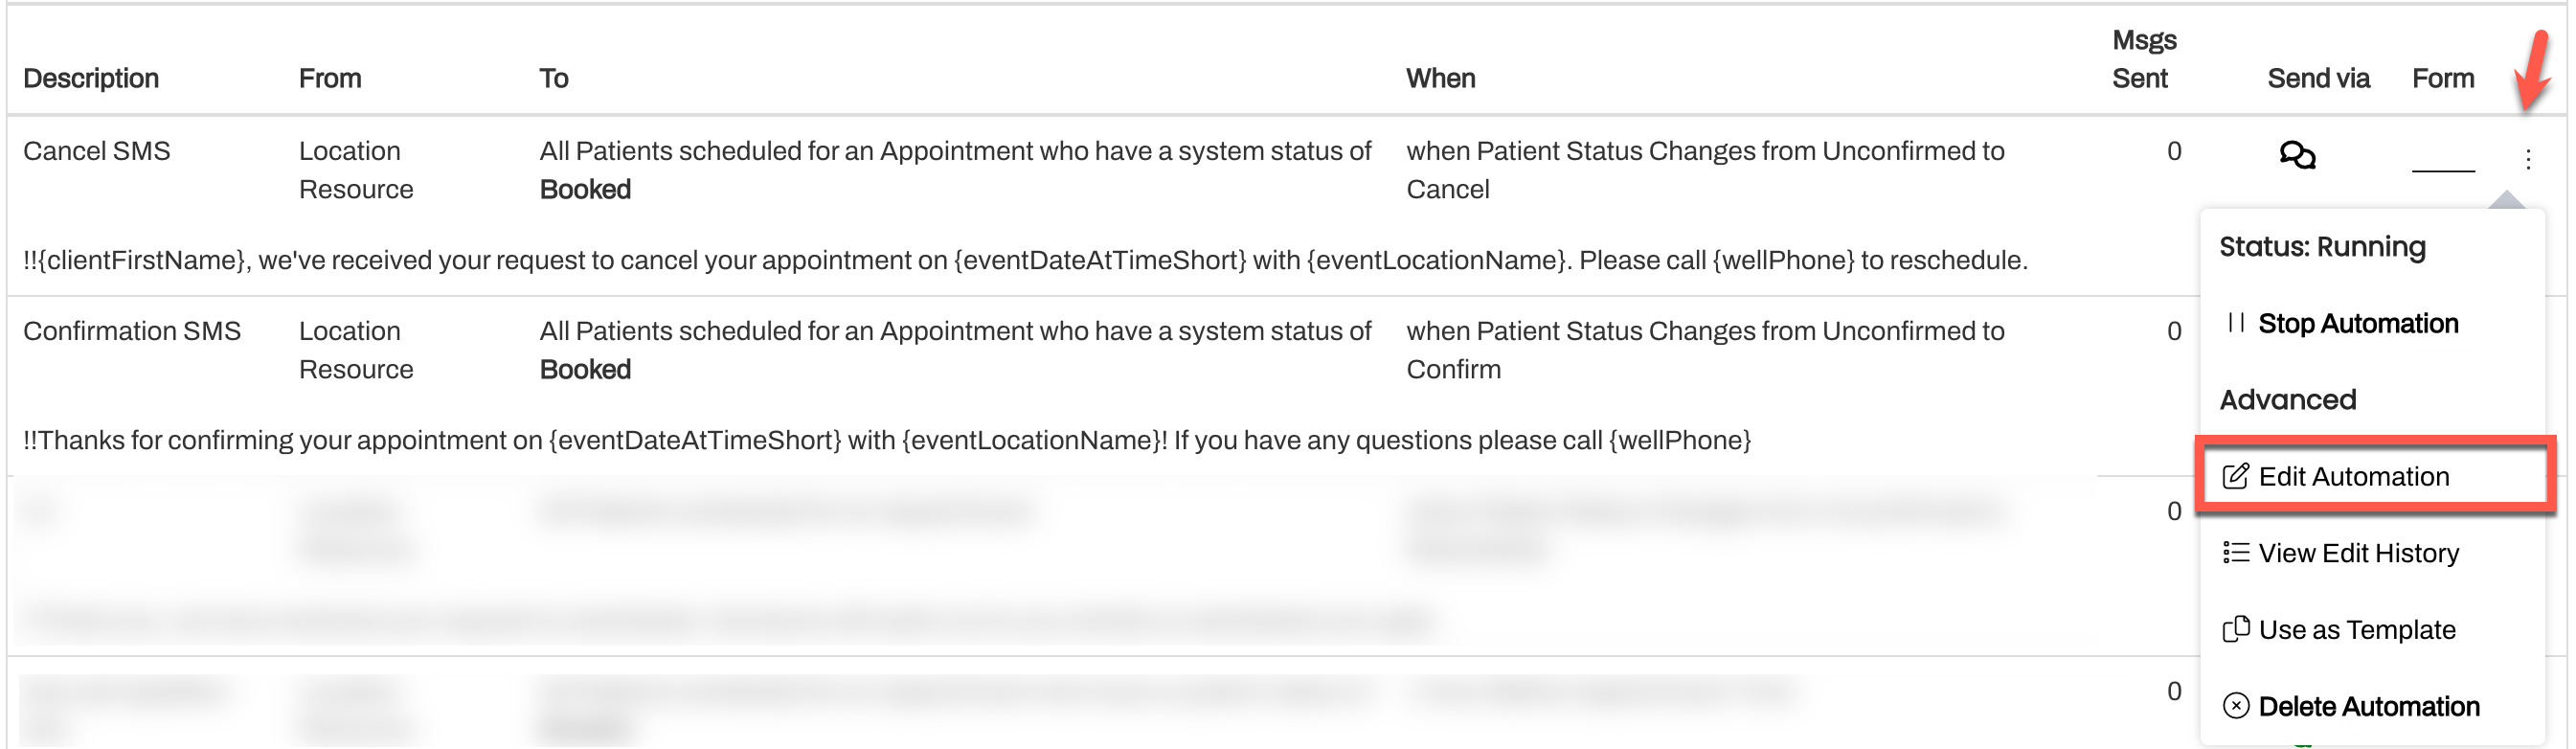
Use the (...) menu to select Edit Automation.
From the What should this Automation say? section, click on the Call tab. Note: If the section is grayed out, this Automation is a Default Automation and the call can only be previewed from the Default Automations page (Enterprise Settings > Default Automations).
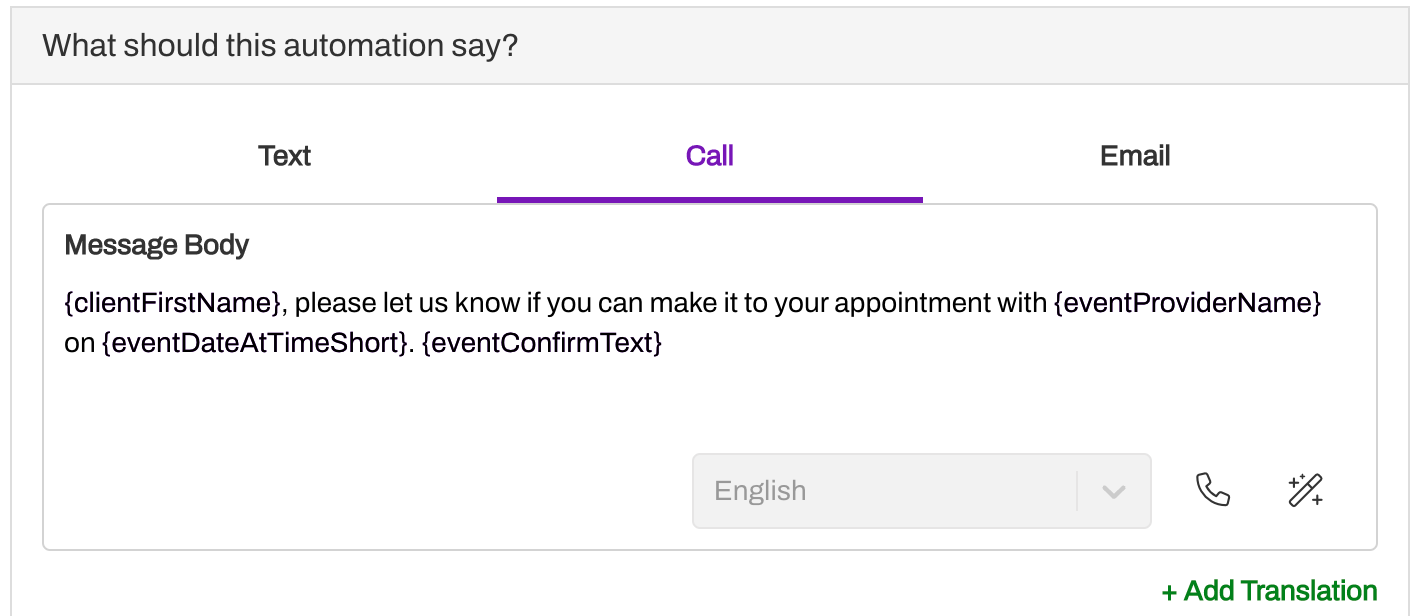
Select the Phone icon under the call message.
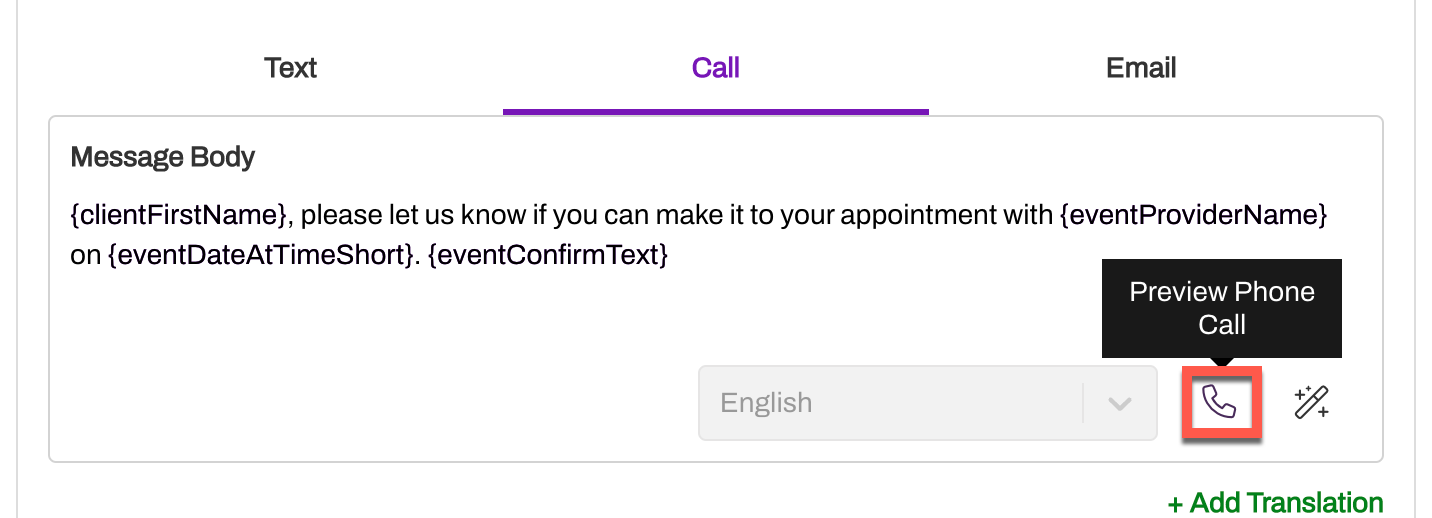
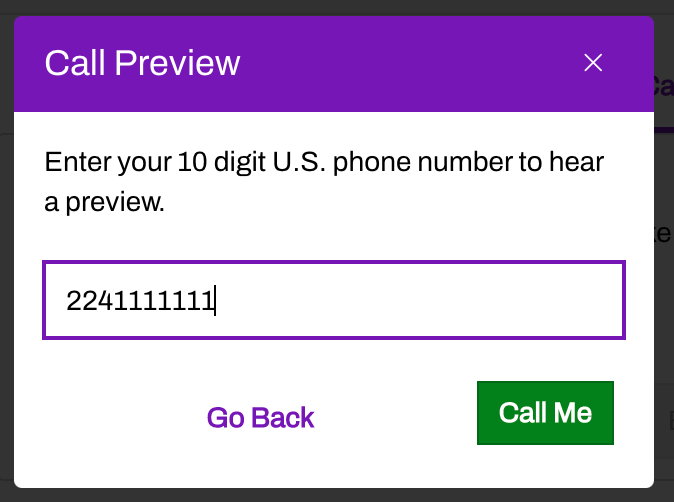
Enter a valid phone number and click Call Me.
Say “Hello” to activate the message.
Edit Automations
Depending on where the Automation was built (Default or Practice-level), you will have the ability to edit some or all fields. Anything that is grayed out when editing the Automation at the Practice-level is inherited from the Default Automation and can only be updated there. To learn more about Automation fields, check out Creating Automated Messages.
To edit an Automation:
- Use the (...) menu to select Edit Automation. Automations can be edited from the Paused or Running tab.

- When done editing the Automation, click Update to save the changes.
Paused and Incomplete Automations
To manage any paused or incomplete Automations, go to the Paused tab to view and edit inactive items.
 Incomplete Automations
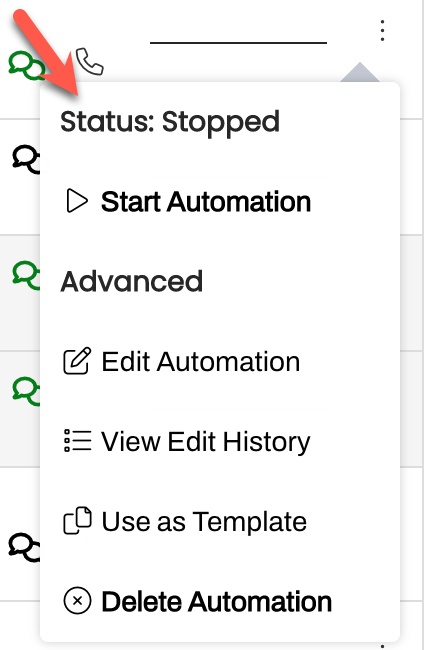
An Automation is incomplete if any of the required sections are not populated. To determine whether an inactive Automation is incomplete, open the (...) menu. At the top of the drop-down menu, the Automation will have Status: Incomplete if there is any missing information.

Select Edit Automation to finish building the Automation. You will not be able to start the Automation until its status is Stopped.
Pause Automation
If you no longer want to send a certain Automation, you can pause it by opening its (...) menu and choosing Stop Automation. Automations that are edited will automatically be paused and moved to the Paused status. Locate the Automation and use its (...) menu to select Start Automation. If you do not restart the Automation, the Automation will not be sent.
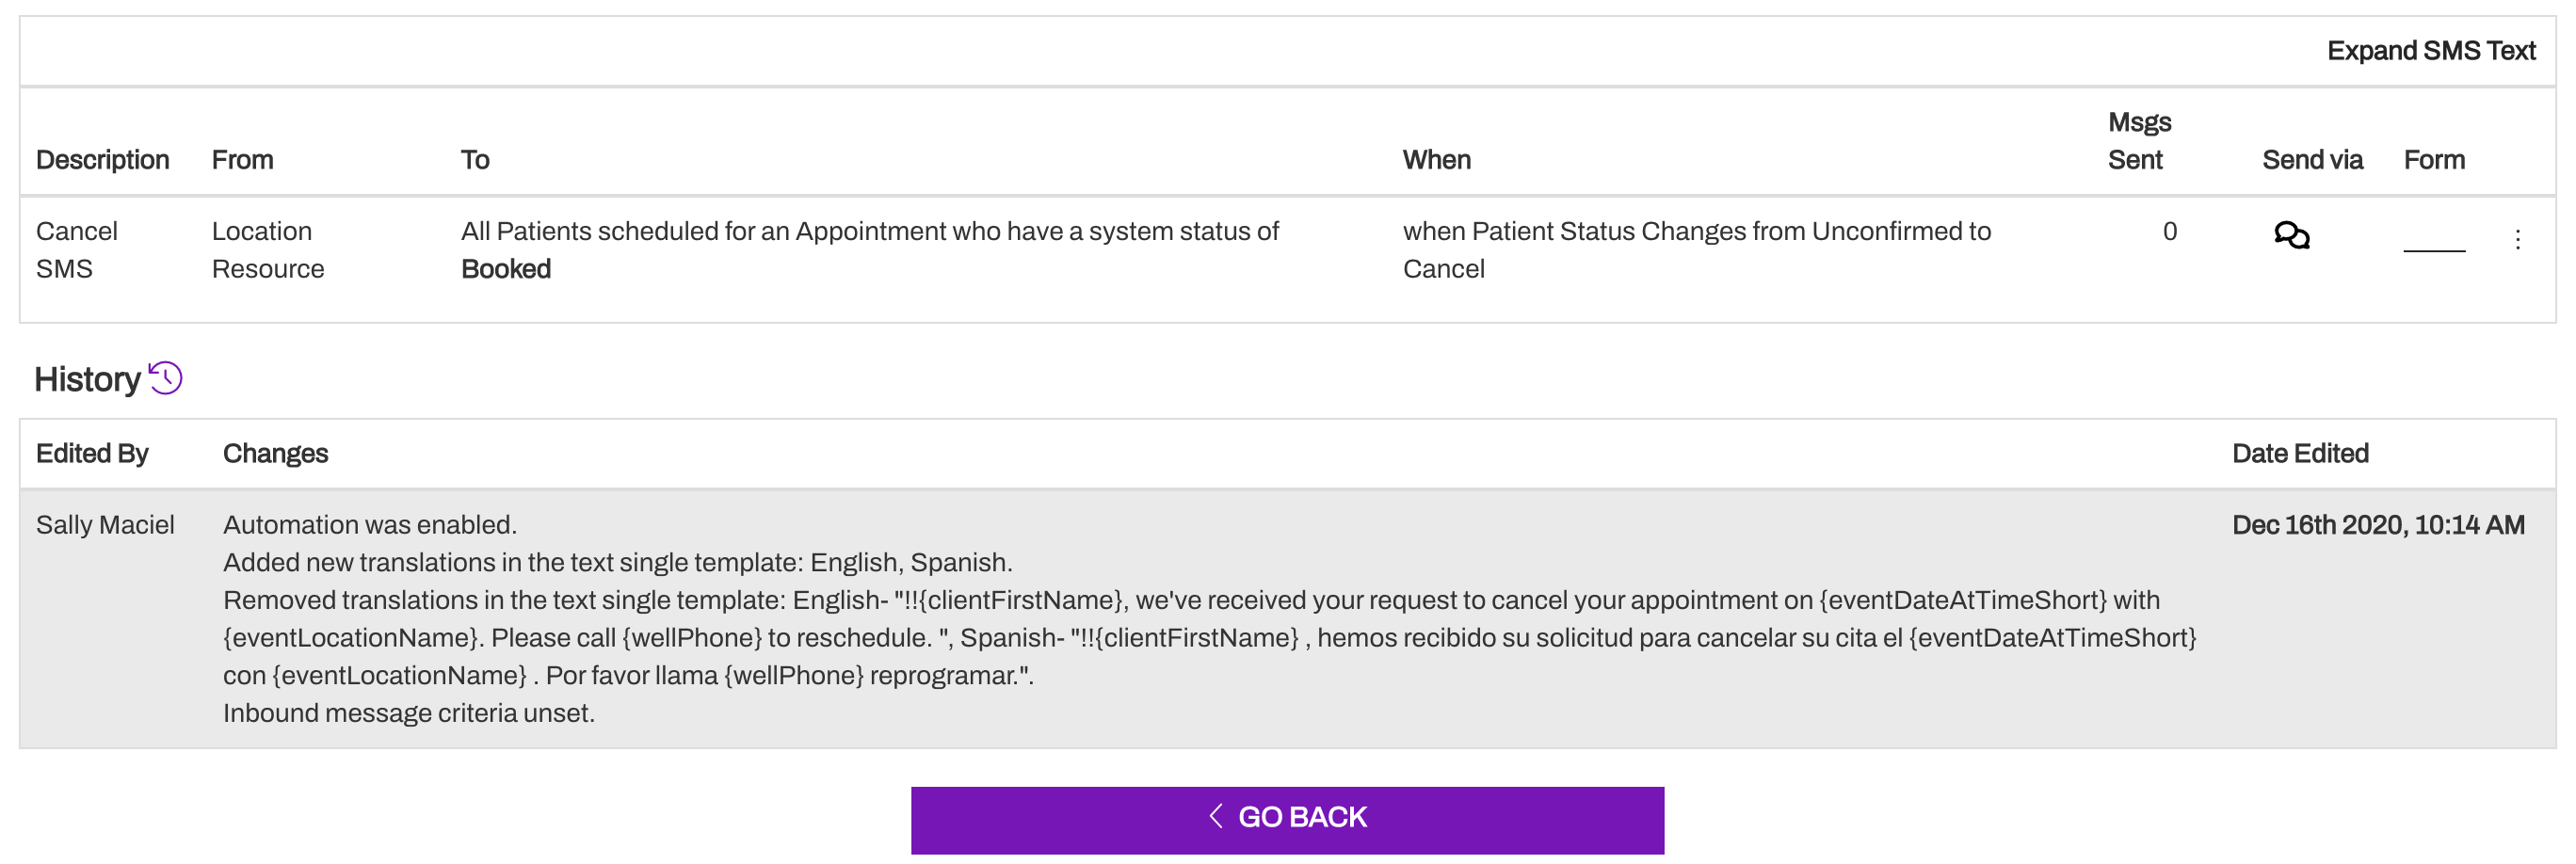
View Edit History
An Automation's behavior will likely change after it has been edited. Although most edits are made to improve functionality for your staff, some changes may have unintended effects. You can review the full edit history for each Automation from the Automations page.
The Edit History contains each change made and logs the user who made the change and when those changes were made.
To view an Automation's Edit History:
Click on the (...) menu for the Automation you want to review and choose View Edit History.

Here, you can view when the Automation was created and changes made, with the most recent update listed first.