Broadcasts
- Get Started
- Release Notes
- Triggers
- Patient Channel
- Troubleshooting and FAQ
- Patient Facesheet
- Technical Specifications
- Insights & Analytics
- Inbox
- Conversation Flows
- Campaigns
- Lines & Resources Requests
- Lines, Events, Resources
- SMS Basics
- Automations
- Referrals
- AI Agents
- Add-Ons
- Users and Groups
- Platform Settings and Configuration
- Self-Rescheduling
- Recalls
- Marketplace
- Artera Harmony Federal Edition
Table of Contents
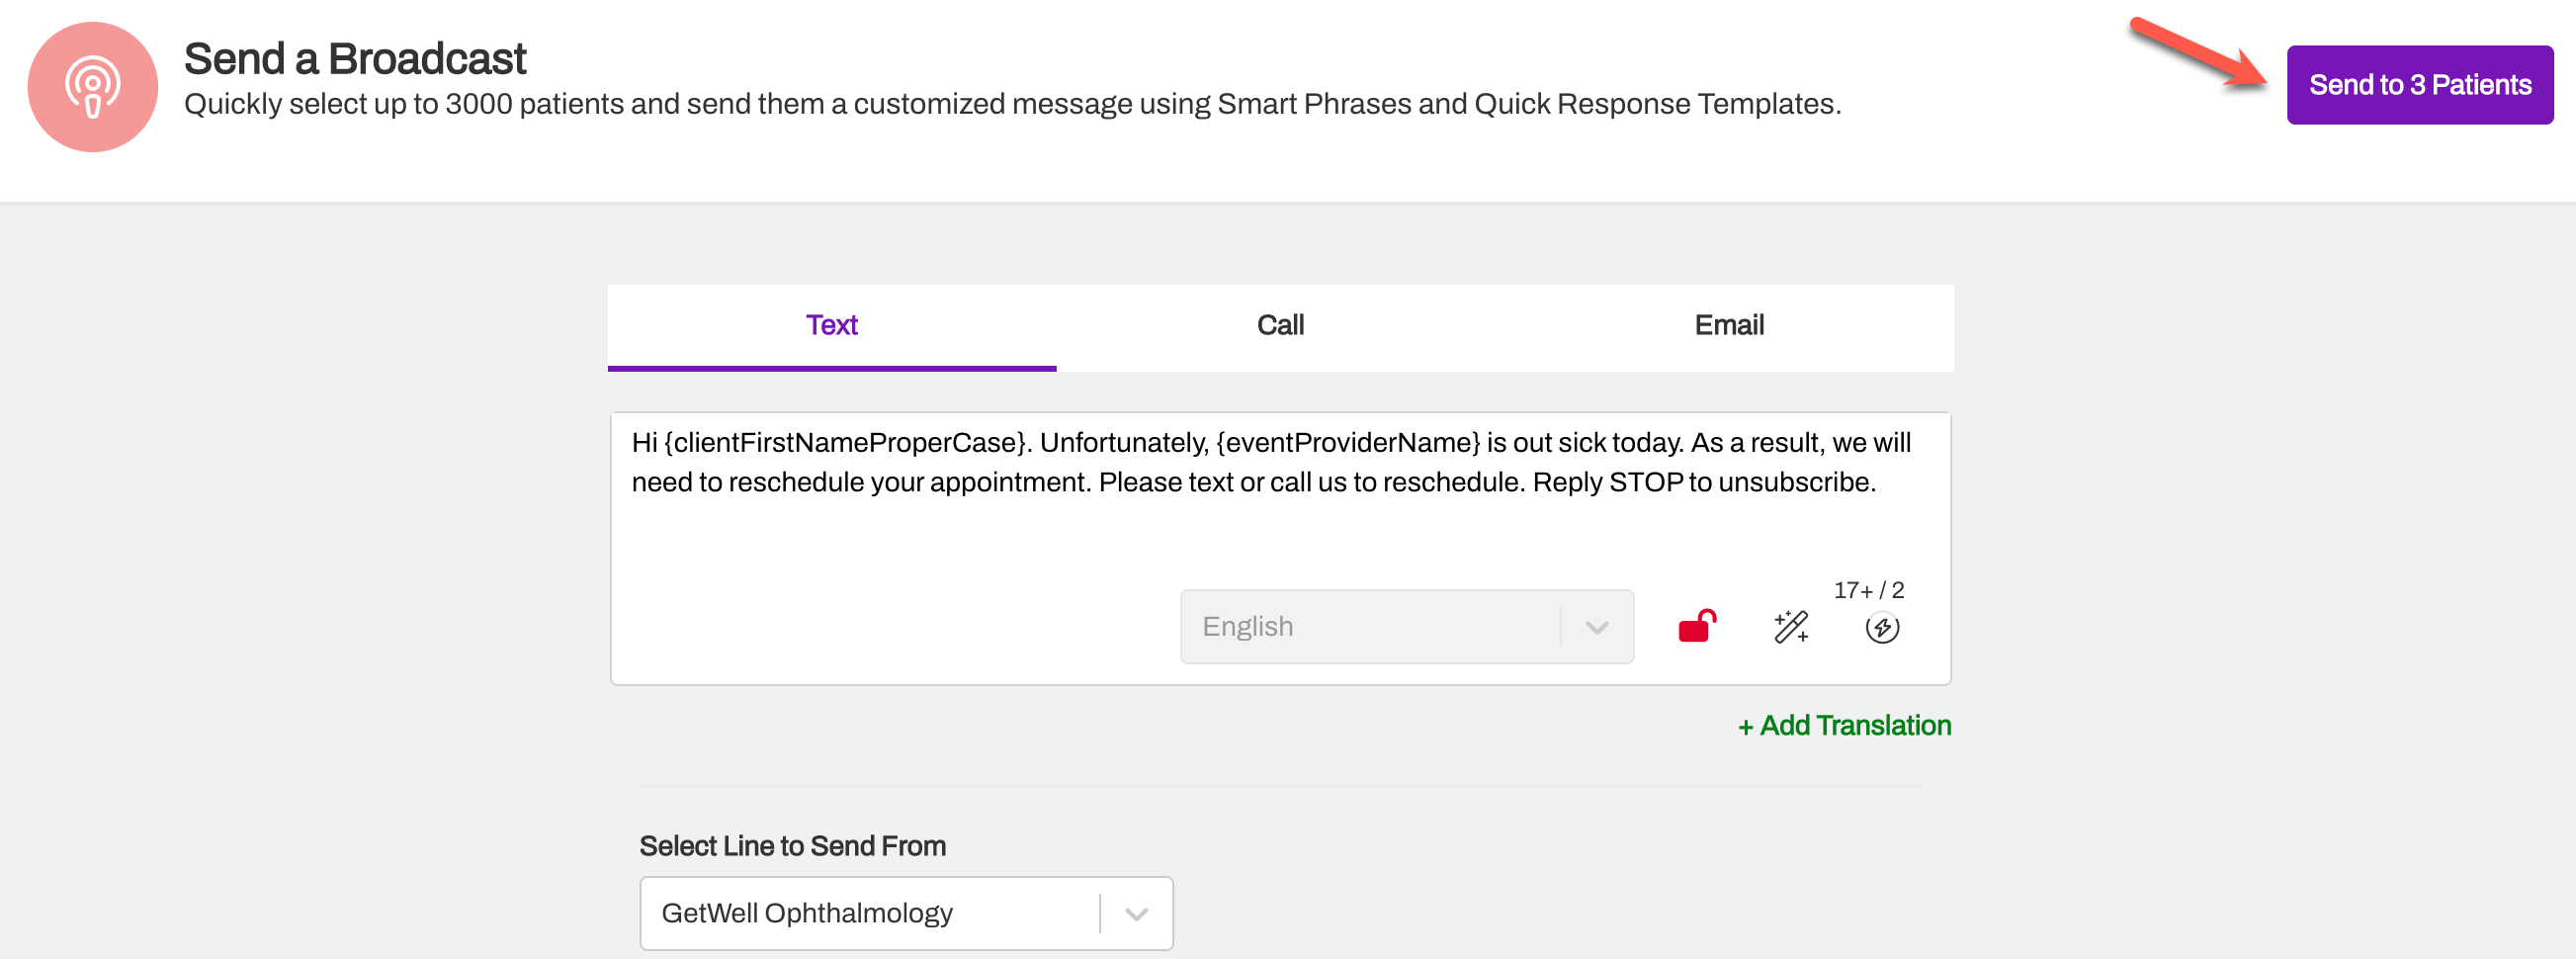
Creating a BroadcastSelecting PatientsStarred ViewCrafting Your Broadcast MessageMessage ExamplesBroadcasts allow you to send the same message to multiple patients with a single action. Broadcasts can be used to let patients know about a change in the schedule or following up with No Shows. With Broadcasts, you can quickly select up to 3,000 patients per Practice and send the chosen patients a customized message through text, call, or email.
NOTE: Any user can send Broadcast messages as there is no ability to restrict use by User Type or Permissions.
Creating a Broadcast
Broadcast Messages can be created from the Recent Messages, Scheduled, or Starred Patient views. Of the three, the Scheduled view is the most commonly used view for Broadcast creation.
Let’s use the following example: You need to inform all of Dr. Greene's patients that their appointments for today are canceled as Dr. Greene is out sick.
Selecting Patients
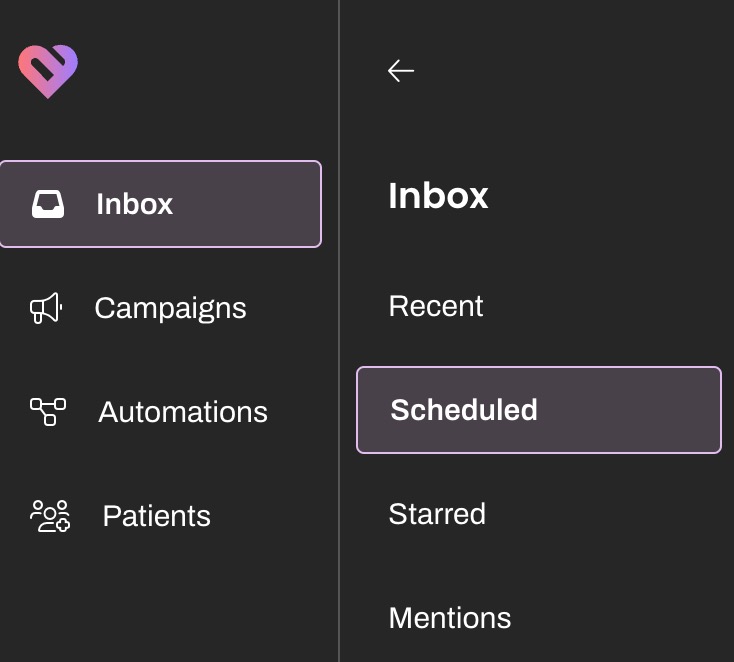
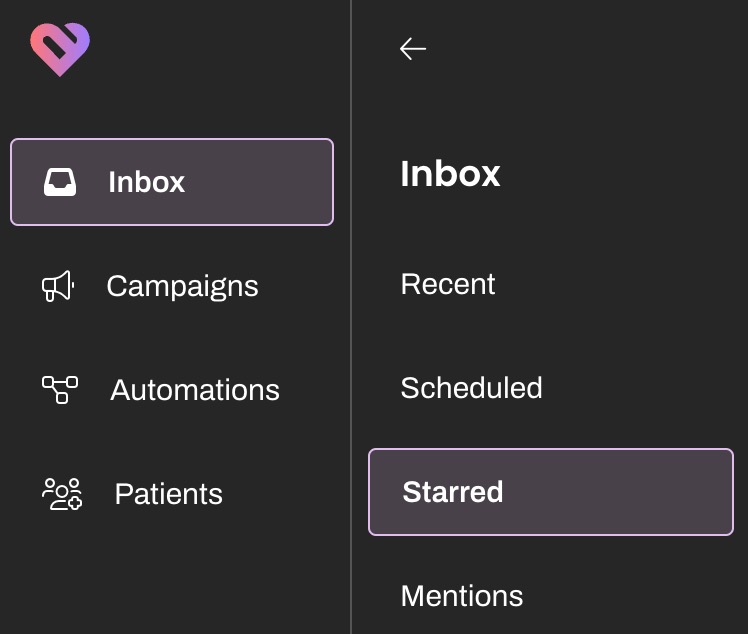
- Open the Scheduled Patients view by selecting Inbox > Scheduled.
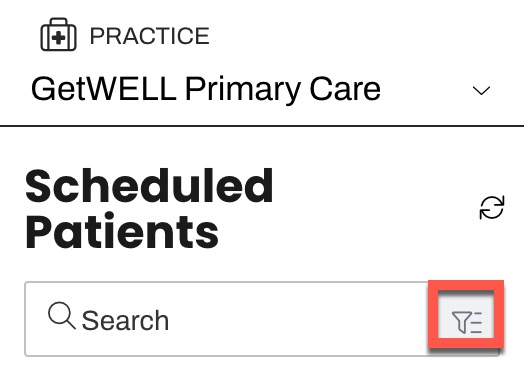
- Click on the Filters icon. Here, you can filter by Appointment Status, Line, Event, Provider, and Location. While Line is available, today, the filter does not behave as expected.
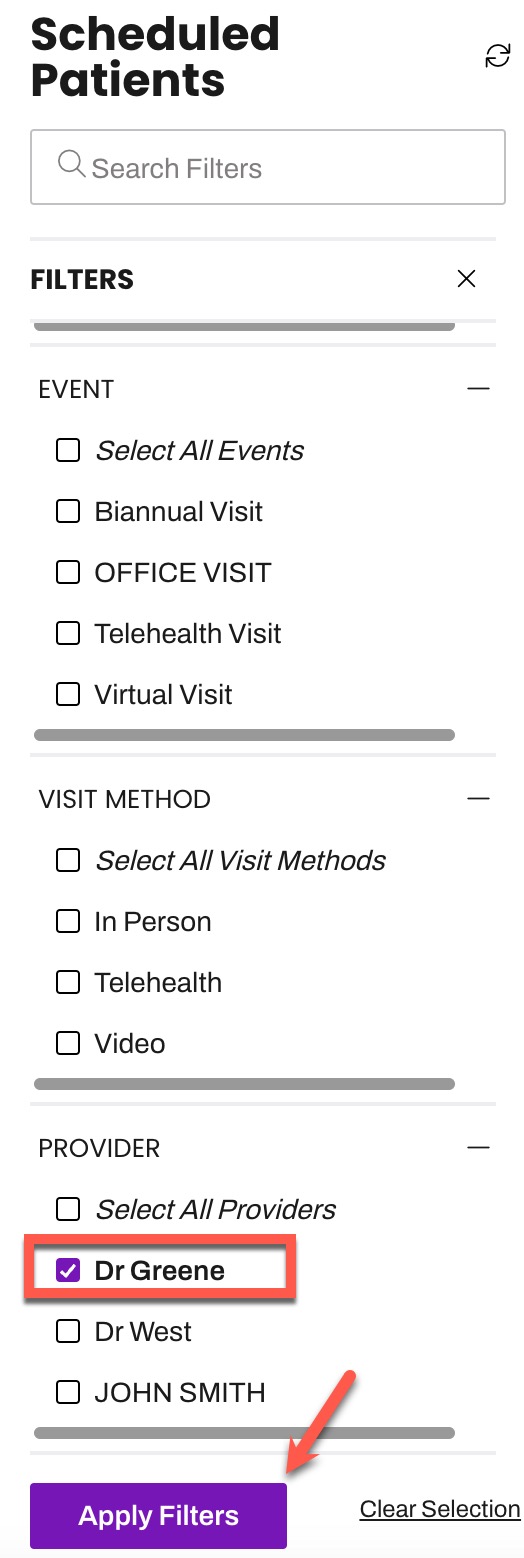
- Scroll down to the Provider filters section and select Dr. Greene. Then, click Apply Filters.
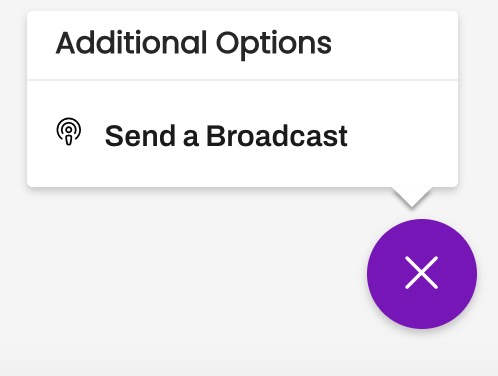
- Next, open the Options (...) menu at the bottom of the page and select Send a Broadcast.

-
Each patient that matches your filter criteria will have a checkbox near their name. Either use the individual checkboxes or the Select All option at the top of the page to choose the patients you would like to message.

Keyboard Shortcuts
When selecting patients, you can use the following keyboard shortcuts:
- To select or deselect individual Patient Channels, press Command + Option + Click (on a Mac) or CTRL+Click (on a PC) for the desired patients.
- To select multiple consecutive Patient Channels press Shift + Click on the patient at the top of your list, then press Shift + Click on the final patient on your list to automatically select all patients that are in between.
Starred View
If you need to send a specific group of patients a Broadcast for something like picking up a prescription, we recommend using the Starred view. This is a lot easier than manually messaging or calling patients individually.
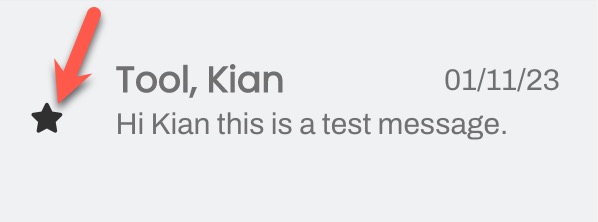
- In your Recent view, locate the patients you want to message and select the Star to the left of their name.
- Once you have selected the patients, navigate to your Starred view. To do this, select Inbox > Starred.
-
Next, select the Options (...) menu at the bottom of the page and select Send a Broadcast. You can simply unstar the patients when you are done.
- Either use the individual checkboxes or the Select All option at the top of the page to choose the patients you would like to message.
Crafting Your Broadcast Message
Broadcasts can be sent by text, email, call, or any combination of the three. Broadcasts will only send one message per patient, click here to learn more about Broadcast deliverability.
-
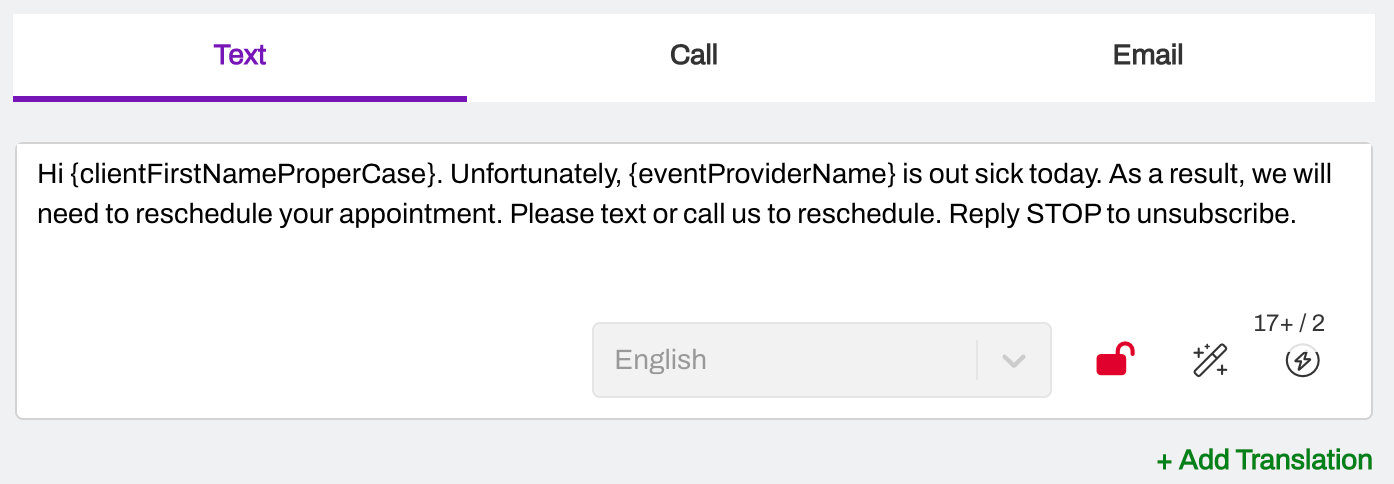
Next, create your message for each of the desired delivery options. We typically recommend creating both SMS and call messages to increase the chances of successful delivery to the patients.
- Unsecure Broadcast text messages must be under 1,600 characters, otherwise, the message will fail to send and you will receive a yellow warning. If the Broadcast message includes Smart Phrases, the character limit is reduced to 1,000. You can check this by ensuring the denominator of the fraction of the character count in the bottom right corner of the message is equal to 10 or less. Learn more about SMS Character Limits.
-
To prevent your Broadcast from being deciphered as spam by patient phone carriers, you must include opt-out language within your message. A common example of opt-out language is: "Reply STOP to unsubscribe."
-
NOTE: If a patient chooses to opt-out, they will be opting out of future messages sent from the Enterprise's high-volume toll-free number. This includes Campaigns, which are also sent from this number. Click here to learn more.
-
NOTE: If a patient chooses to opt-out, they will be opting out of future messages sent from the Enterprise's high-volume toll-free number. This includes Campaigns, which are also sent from this number. Click here to learn more.
-
Use the appropriate Smart Phrases to personalize the message. {clientFirstNameProperCase} is always a good option.
- Alternatively, use a Quick Response, if you have one created for the purpose of the Broadcast.
- Important: You can only use Event Smart Phrases (i.e {eventProviderName} when sending a Broadcast from the Scheduled View. They are not supported for Broadcasts sent from the Recent or Starred view. This includes Quick Response messages that include an Event Smart Phrase.
-
Choose whether to send your text and email message as Secure or Unsecure.
- To send a Broadcast securely, which requires the patients receiving the message to click a link and enter identifying patient information to view the Broadcast, then make sure the lock icon is closed as shown in the image below.
-
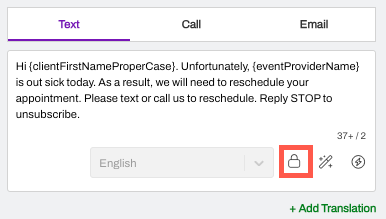
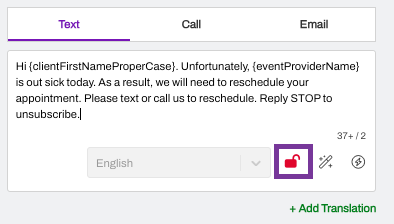
To send a Broadcast unsecurely, which means the Broadcast will be sent as a normal SMS or email and will not require the patient to enter identifying information to view the Broadcast, then make sure to click on the lock icon, shown in the gif below, to unlock the message so it will send unsecurely.
- NOTE: You can tell a message will be sent unsecurely because the lock icon will display as unlocked and the lock icon will turn red.
- NOTE: You can tell a message will be sent unsecurely because the lock icon will display as unlocked and the lock icon will turn red.
- To send a Broadcast securely, which requires the patients receiving the message to click a link and enter identifying patient information to view the Broadcast, then make sure the lock icon is closed as shown in the image below.
- Broadcasts respect Language Preferences. You can add Translations, if supported by your integration.
-
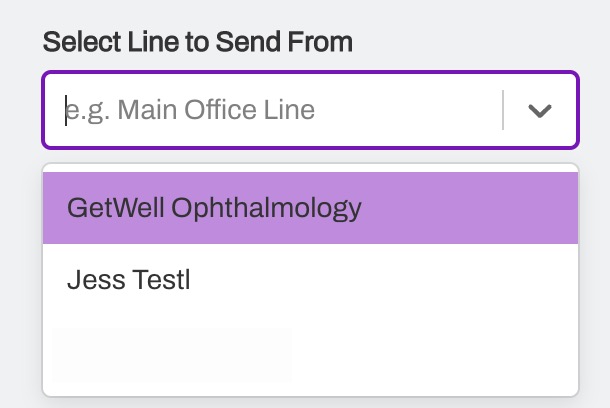
Select the Line to associate with this Broadcast. Messages will be delivered by your Enterprise's high-volume toll-free number, however, patient responses will be directed to the Line chosen.
- Artera uses a high-volume toll-free number instead of the Line's phone number to circumvent the restrictions that phone carriers place on the number of texts that can be sent from a single phone number. Sending the Broadcast Messages by a toll-free number helps increase deliverability and prevents phone carriers from perceiving your phone number as spam.
- When you are satisfied with your message, select Send. This button dynamically updates with the total number of patients selected.
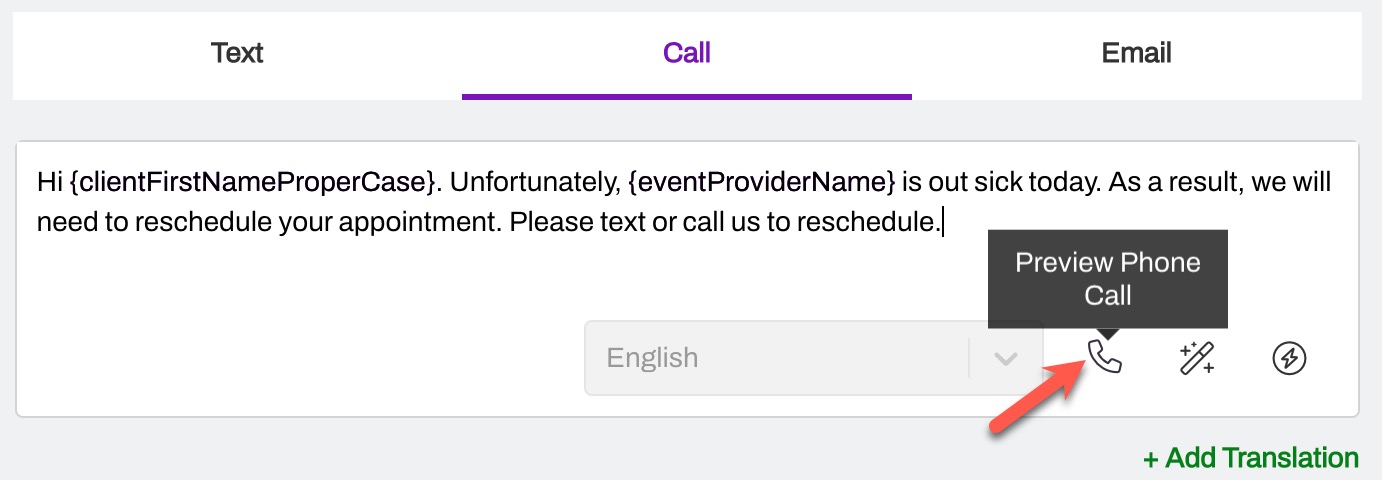
Preview Phone Call
If including a Call message, you can validate how your Call message will sound to the patient by previewing the phone call. In the sample call, any Smart Phrases will be randomly populated with generic placeholders.
- Click the Phone icon at the bottom of the call message.
- Enter a valid phone number and select Call Me.
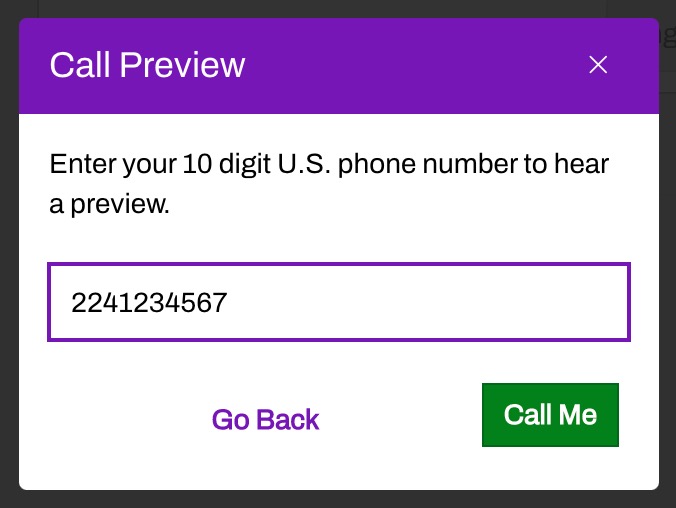
- Be sure to say “Hello” to activate the message delivery.