Triggers Overview
- Get Started
- Troubleshooting and FAQ
- Release Notes
- Patient Channel
- Triggers
- Technical Specifications
- Patient Facesheet
- Insights & Analytics
- Conversation Flows
- Campaigns
- SMS Basics
- Inbox
- Lines & Resources Requests
- Lines, Events, Resources
- Referrals
- AI Agents
- Add-Ons
- Users and Groups
- Platform Settings and Configuration
- Self-Rescheduling
- Recalls
- Artera Harmony Federal Edition
- Marketplace
What are Triggers?
Triggers allow Enterprise Users to build automatic Appointment, Recall, and Referral workflows. These Triggers are designed to reduce appointment management overhead, decrease no-shows, and increase patient preparedness.
As an Enterprise User, you can configure Triggers that can be used across your Artera Practices. This functionality allows you to set a standard for your organization controlling both message timing and brand voice. There are various types of Triggers that can be created in Artera. Some require specific integration efforts and may require an additional project to implement if you decide to expand your utilization of Artera.
Trigger Modules
Triggers Overview Pages
To access your organization's Triggers, select Automations > Triggers from the navigation bar. The Triggers overview page is composed of two sections: Outbound and Inbound.
Outbound Triggers manage automated appointment, recall, and referral messages sent to patients based on specific criteria. Conversely, Inbound Triggers allow you to automate how the practice responds or takes action when a patient sends a message.
Page Overview: Outbound

- Outbound and Inbound: Toggle between Outbound and Inbound Triggers.
-
Trigger Details:
- Name: The Trigger's title.
- Last Updated: Displays the last date and time the Trigger was updated.
- Type: The type of Outbound Trigger such as Appointment, Recall, or Referral.
- Send From: The Resource the Trigger is sent from. Resource types are Provider, Location, Device, and General.
- Practices: Total number of Practices configured to send this Trigger.
- Filters: This displays the total number of Audience and/or Event filters configured for this Trigger. Select the link to be routed to the Trigger's filters page.
- Resource Filters: This displays the total number of Provider, Location, Device, and/or General Filters (other) configured for this Trigger. Select the link to be routed to the Trigger's filters page.
- Timing: This indicates when the Trigger will be sent.
- Method: The message types the Trigger can be sent by, This includes text, call, and/or email.
- Secure: This indicates whether the Trigger's text message will be sent securely.
- Merged: Indicates if the Trigger has been configured to support Merged Messaging.
- Status: Indicates whether the Trigger is on or off.
- Message: Select this link to preview the text, phone, or email message content. This does not display any translations added to Triggers.
- Actions: Selecting the three-dot menu will allow you to turn on/off, edit, duplicate, or delete the Trigger.
-
Search Filters: Filter the Triggers page to locate Triggers by name, Practice, Event, Resource, or Message Text. A user's selected filters persist after navigating away from the Triggers Overview page.
NOTE: Only one filter in each category can be applied at once. - Actions: Select this button to turn Triggers on/off in bulk.
- Create New: Select this to create a new Trigger.
- Rows per Page: Select how many Triggers per page you would like to see.
Page Overview: Inbound

- Outbound and Inbound: Toggle between the Outbound and Inbound Triggers pages.
-
Trigger Details
- Name: The Trigger's title.
- Last Updated: Displays the last date and time the Trigger was updated.
- Trigger: This identifies whether the keyword sent by the patient needs to be in response to a confirmation message ("Response to confirmation") or not ("Response to any message").
- Practices: Total number of Practices configured to send this Trigger.
- Lines: These are the lines that use this Inbound Trigger.
- Keywords: The total number of words and phrases set up as keywords for this Trigger. These items will trigger the Inbound action when received from the patient. Select the hyperlink to view the words or phrases.
- Actions: The associated action the keyword will trigger.
- Hours: This indicates when the Inbound Trigger will take action.
- Method: The icons display which message types the Inbound Message Trigger will send, if the action chosen is to "Send Response to Patient" or "Create Mention". This includes text, call, and/or email.
- Secure: This indicates whether the auto-reply back to the patient will be sent as a secure message (lock icon).
- Status: Indicates whether the Trigger is on or off.
- Message: Select this link to preview the text, phone, or email message content if an auto-response is being sent to the patient. This does not display any translations added to Inbound Triggers that prompt a response back to the patient.
- Actions: Selecting the three-dot menu will allow you to turn on/off, edit, duplicate, or delete the Trigger.
-
Search Filters: Filter the Triggers page to locate Inbound Message Triggers by Name, Practice, Line, or Keywords.
NOTE: Only one filter in each category can be applied at once. - Create New: Select this to add a new Trigger.
- Bulk Actions: Select this button to turn Triggers on/off in bulk, saving you time and effort.
- Rows per page: Select how many Triggers per page you would like to see.
FAQs
-
How do I add translations to the Trigger?
When entering Trigger message content, you can automatically translate messages into 100+ different languages.To add a translation:- Craft your message in your preferred language.
-
Select the EN button.

-
Search for and select the language(s) you want to translate the message into.

- Have a proficient speaker of that language verify the translation to make sure it is correct. Check the box confirming verification.

-
Select the trash can to delete the added translation(s), if necessary.
NOTE: For email messages, you will need to manually translate the subject line. For call messages, the {eventConfirmText} Smart Phrase is supported in 23 languages. Therefore, for Triggers designed to capture cancellation, confirmation, or rescheduling, you will be limited on the translations you can support with phone messages. Read more about language preferences here.
-
How can I preview the message content of Triggers?
-
To preview the message content of a Trigger, select the Show hyperlink displayed within the Message column on the Triggers Overview page. This will allow you to preview the text, phone, or email message content of the Trigger selected. Previews will not display any additional translations.

-
To preview the message content of a Trigger, select the Show hyperlink displayed within the Message column on the Triggers Overview page. This will allow you to preview the text, phone, or email message content of the Trigger selected. Previews will not display any additional translations.
-
In which order are Outbound and Inbound Triggers displayed on the Triggers page?
-
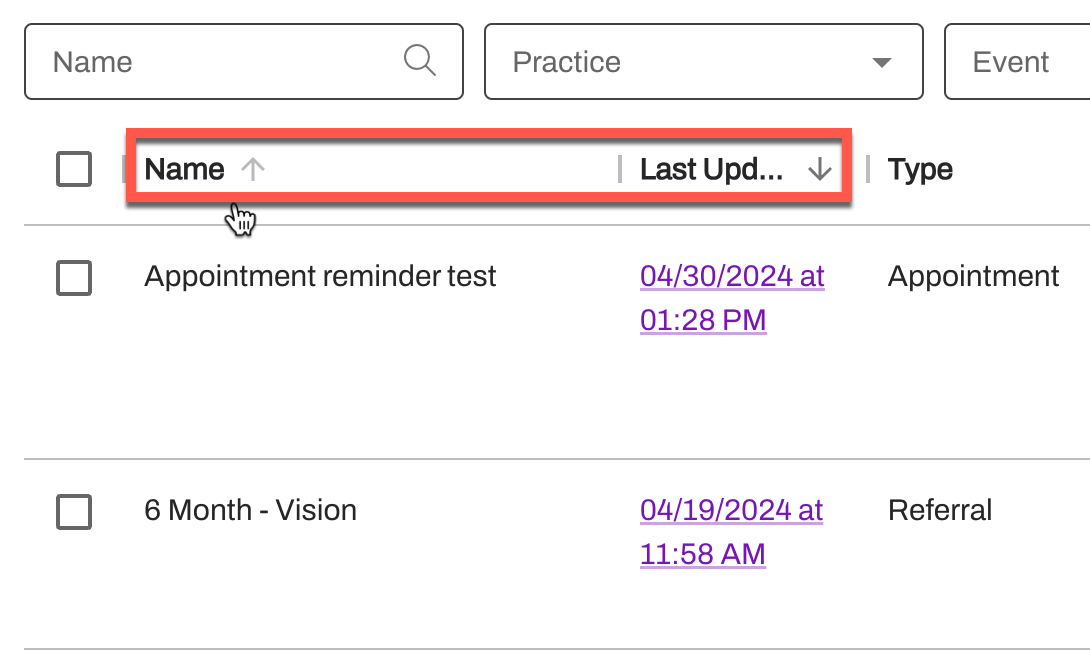
By default, Triggers are displayed in the order that they were last updated. However, you can also sort Triggers by date/time or alphabetically by name. To do this, hover over the Name or Last Updated columns and select the arrow to sort.
-
By default, Triggers are displayed in the order that they were last updated. However, you can also sort Triggers by date/time or alphabetically by name. To do this, hover over the Name or Last Updated columns and select the arrow to sort.
-
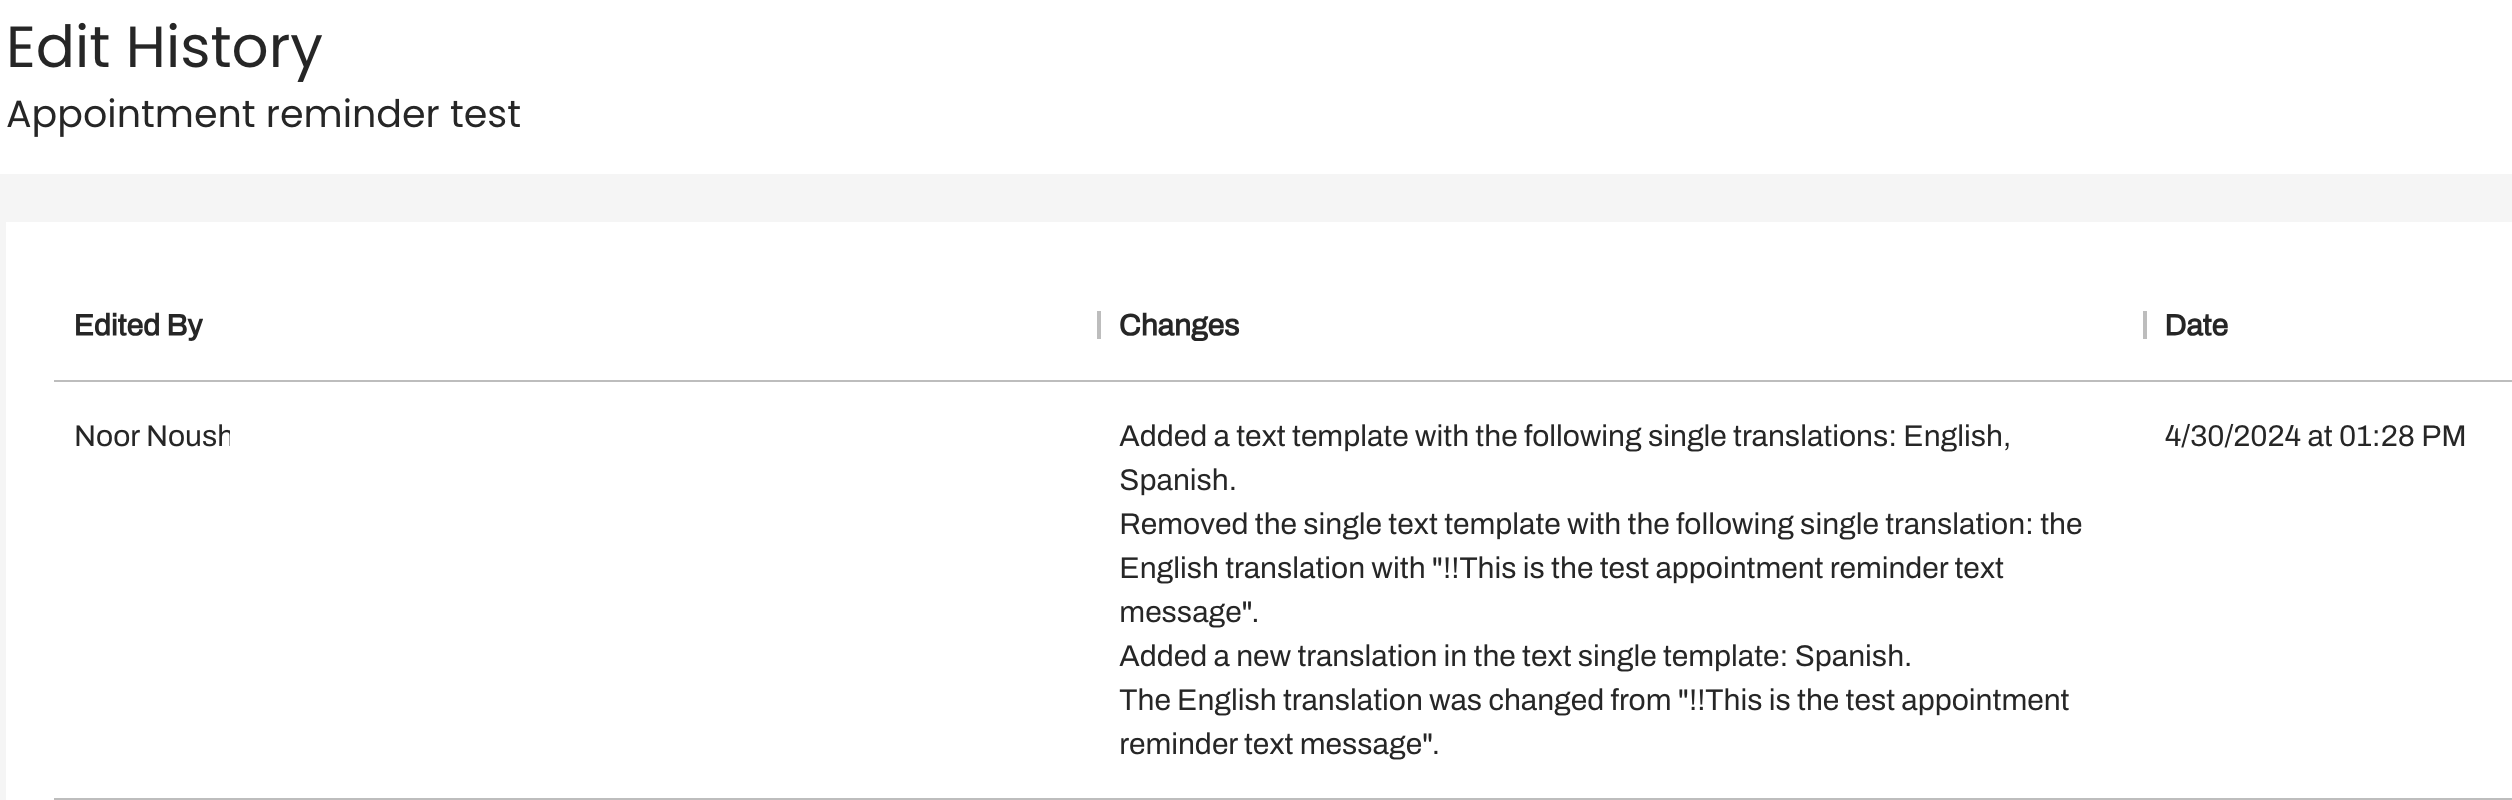
How do I view a Trigger’s Edit History?
-
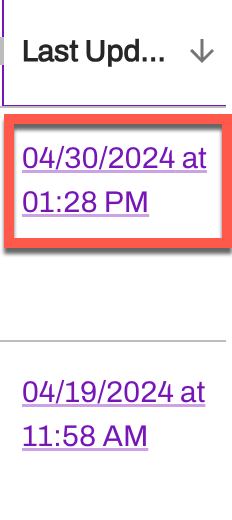
To view the edits made to a Trigger, select the purple date/time hyperlink displayed under the Last Updated column on the Triggers page. The Trigger's Edit History will display, helping you identify which edits were made to the Trigger, when, and by whom.
-
To view the edits made to a Trigger, select the purple date/time hyperlink displayed under the Last Updated column on the Triggers page. The Trigger's Edit History will display, helping you identify which edits were made to the Trigger, when, and by whom.
-
How do I edit a Trigger?
-
To edit a Trigger, navigate to the Triggers Page > locate the Trigger > (...) Action menu > Edit.

- NOTE: When you edit a Trigger that is turned on, it must be saved and restarted. To do this, navigate to the Triggers Page > locate the Trigger that was modified > (...) Action menu > Turn On.
-
To edit a Trigger, navigate to the Triggers Page > locate the Trigger > (...) Action menu > Edit.
-
How do I use the Search Filters on the Triggers page?

- Name: Enter the name of a Trigger. Note that the search functionality looks at words in their entirety so be sure to type in the correct Name of a trigger for successful results.
- Practice: Use the Practice dropdown menu to search for Triggers configured per Practice or type in the name of a Practice. Note that the search functionality looks at words in their entirety so be sure to type in the correct Practice name for successful results.
- Event: Use the Event dropdown menu to search for Triggers configured per Event or type in the name of an Event. Note that the search functionality looks at words in their entirety so be sure to type in the correct Event name for successful results.
- Resource: Use the Resource dropdown menu to search for Triggers configured per Resource or type in the name of a Resource. Note that the search functionality looks at words in their entirety so be sure to type in the correct Resource name for successful results.
- Message text: Use this search feature to search for a Trigger by the contents of its message.
-
What does the Bulk Actions button do?
-
With Bulk Actions, you can quickly enable or disable multiple Triggers across your Enterprise, saving you time and effort. Follow the steps below to use Bulk Actions:
-
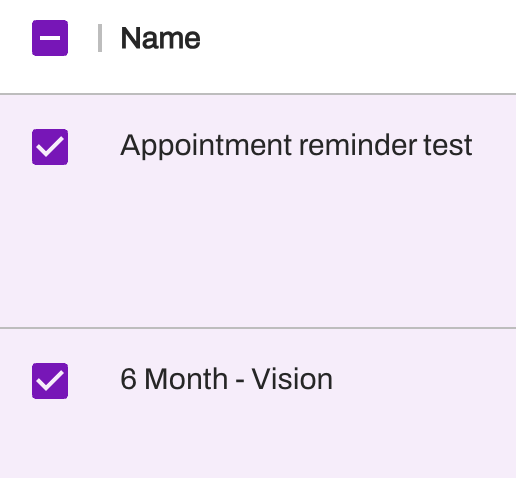
Select the Triggers you want to include in the Bulk Action. TIP: Use the checkbox near the Trigger to select it.
-
Once the Triggers are selected, navigate to the Actions button in the upper-right corner of the page. The total number of Triggers selected will be displayed within the Action button. Select this button to turn Triggers on/off.
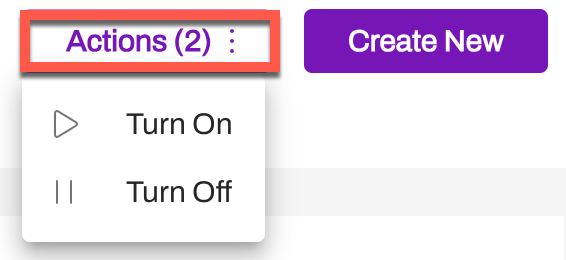
- A new window will open to confirm your selected action. After reviewing, select Bulk Turn On.
-
Select the Triggers you want to include in the Bulk Action. TIP: Use the checkbox near the Trigger to select it.
-
With Bulk Actions, you can quickly enable or disable multiple Triggers across your Enterprise, saving you time and effort. Follow the steps below to use Bulk Actions:
-
I can’t find one of my existing Triggers on the Triggers page, how do I troubleshoot this?
- Try to locate the Trigger by expanding your Rows Per page, you can go up to 100 per page.
- You can also use the Search Filters at the top of the page to locate your Trigger across all your pages.
-
What Time Offset Intervals can be used to configure Triggers to send based on minutes?
- Minutes offset can either be 0 or a minimum of 10 minutes. Then, you can offset the delivery of these messages in 5-minute increments. Appointment Time, Appointment Created, Recall Time, Recall Created, Referral Created, Scheduling Status Change, and Authorization Status Change can all be configured with a time offset.