Create a Conversation Flow from the Library
- Get Started
- Release Notes
- Triggers
- Patient Channel
- Troubleshooting and FAQ
- Patient Facesheet
- Technical Specifications
- Insights & Analytics
- Collaborative Inbox
- Conversation Flows
- Campaigns
- Lines & Resources Requests
- Lines, Events, Resources
- SMS Basics
- Automations
- Referrals
- Add-Ons
- Users and Groups
- Platform Settings and Configuration
- Self-Rescheduling
- Recalls
- Marketplace
Table of Contents
Copying the Conversation Flow Template from the LibraryEdit the Copied Conversation Flow's ConfigurationReview Root Message and Patient ResponsesAdd Actions and Follow Up MessagesSet Conversation Flow to OnWe've created a library of pre-built templates to help you get started with Conversation Flows. Simply choose a template, duplicate it, customize as necessary, and decide how you want to send the conversation to your patients. This feature is available exclusively to Enterprise Users. Click here to learn about the categories of conversation templates available in the Library.
Copying the Conversation Flow Template from the Library
- From the Navigation Bar, select Automations > Conversation Flows.

-
Select the Templates tab and use the search and filter functionality to locate Templates:

- Name: Name of Conversation Flow.
- Smart Phrase: The Smart Phrase associated with the Conversation Flow.
- Type: Artera organizes Templates by "type." Select this dropdown to filter by Template Type.
- Method: The method in which the Conversation Flow will be delivered to patients. Options include SMS and Voice.
-
Use the (...) Actions menu and select View Conversation to preview a Template.

- Once you have completed your review, select New from Template and confirm that you would like to copy the Conversation Flow Template into your environment:
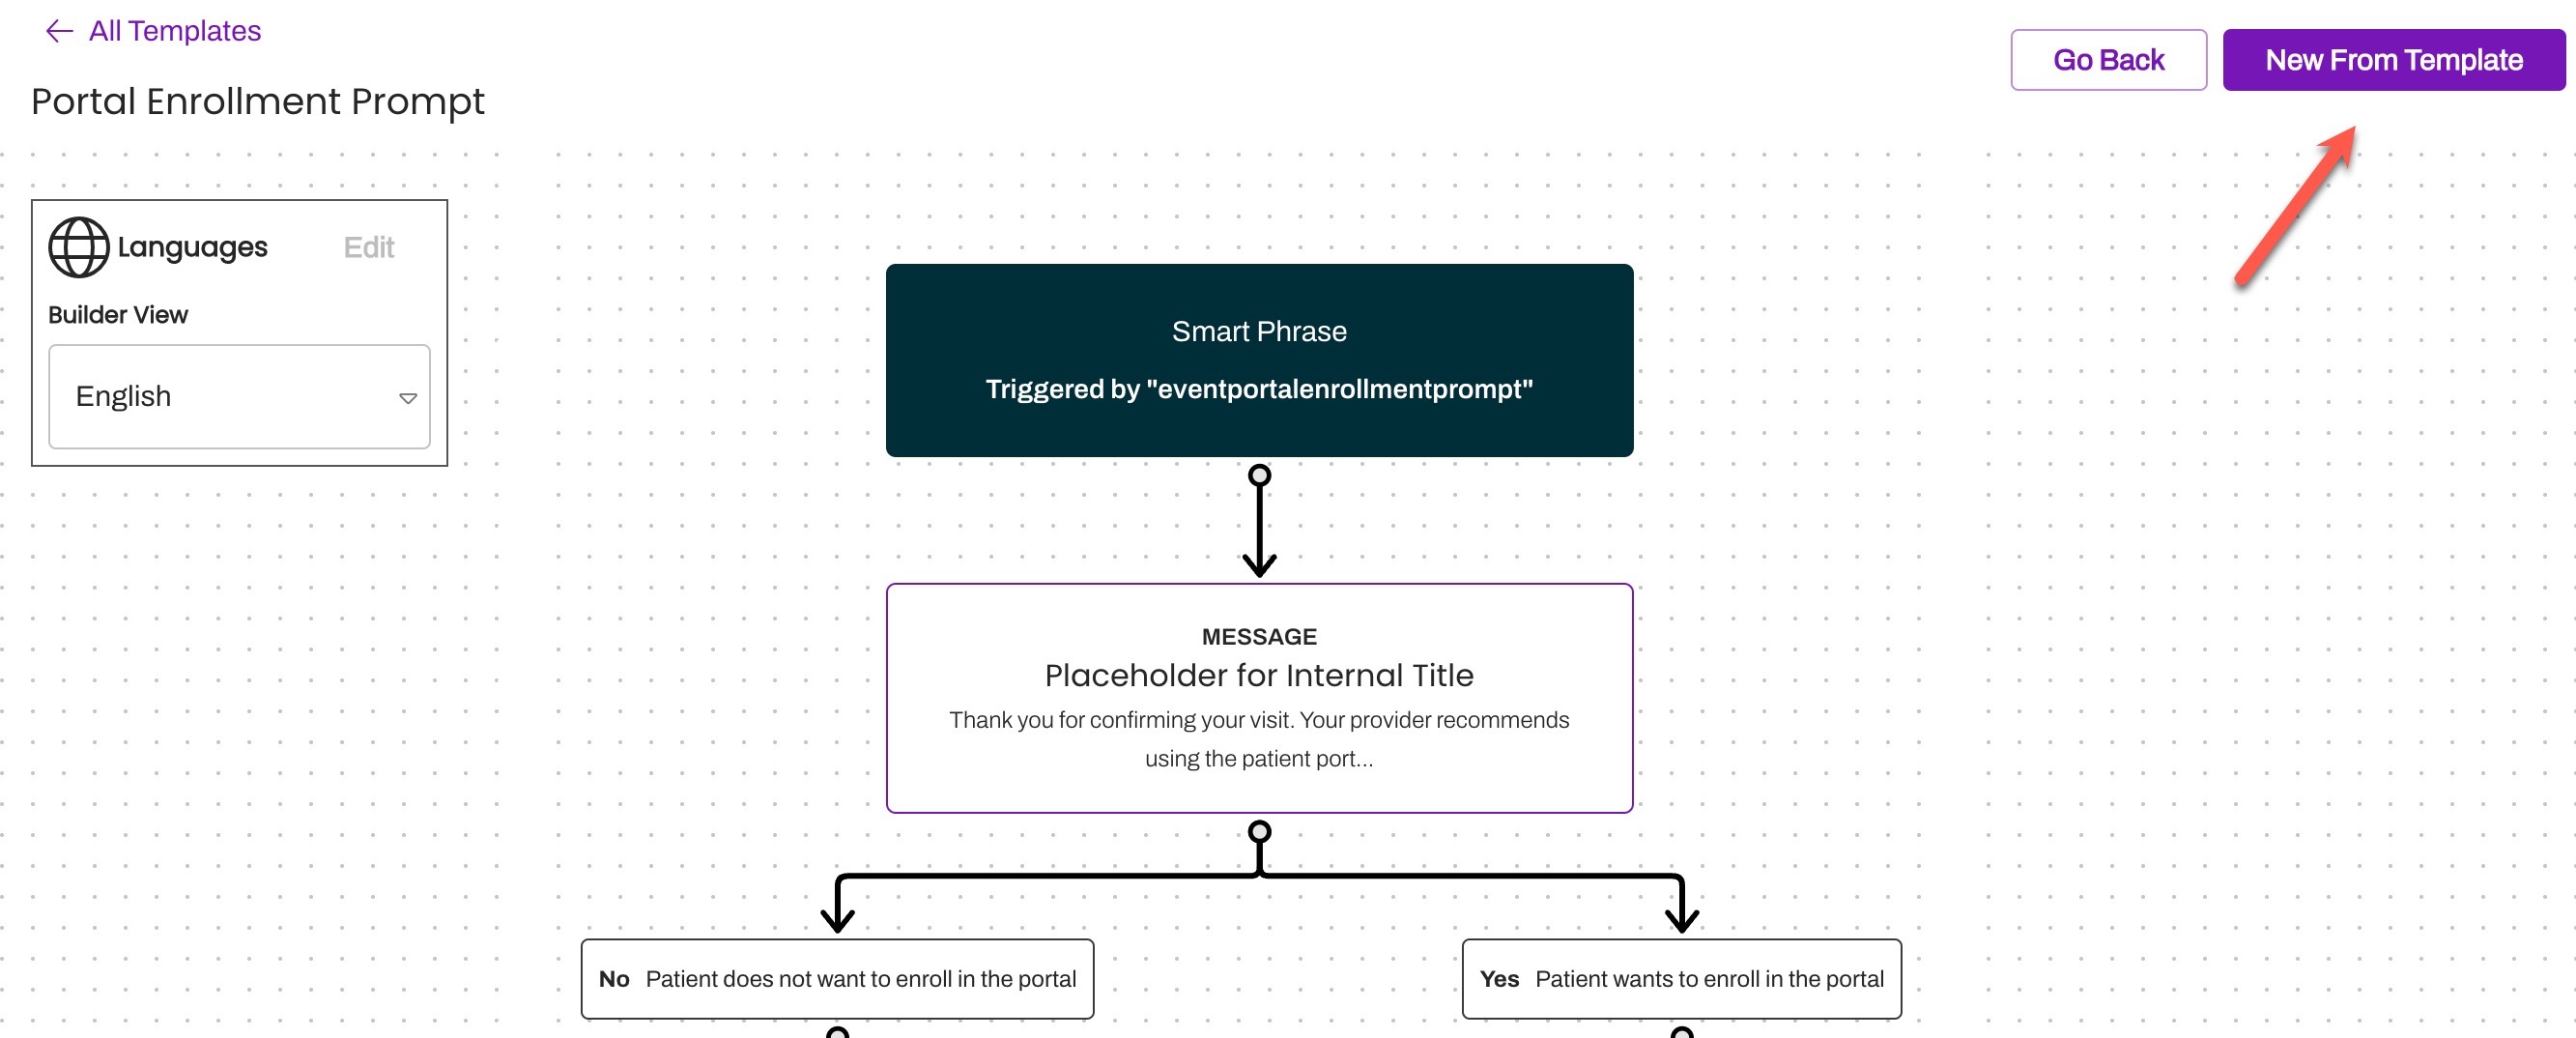
-
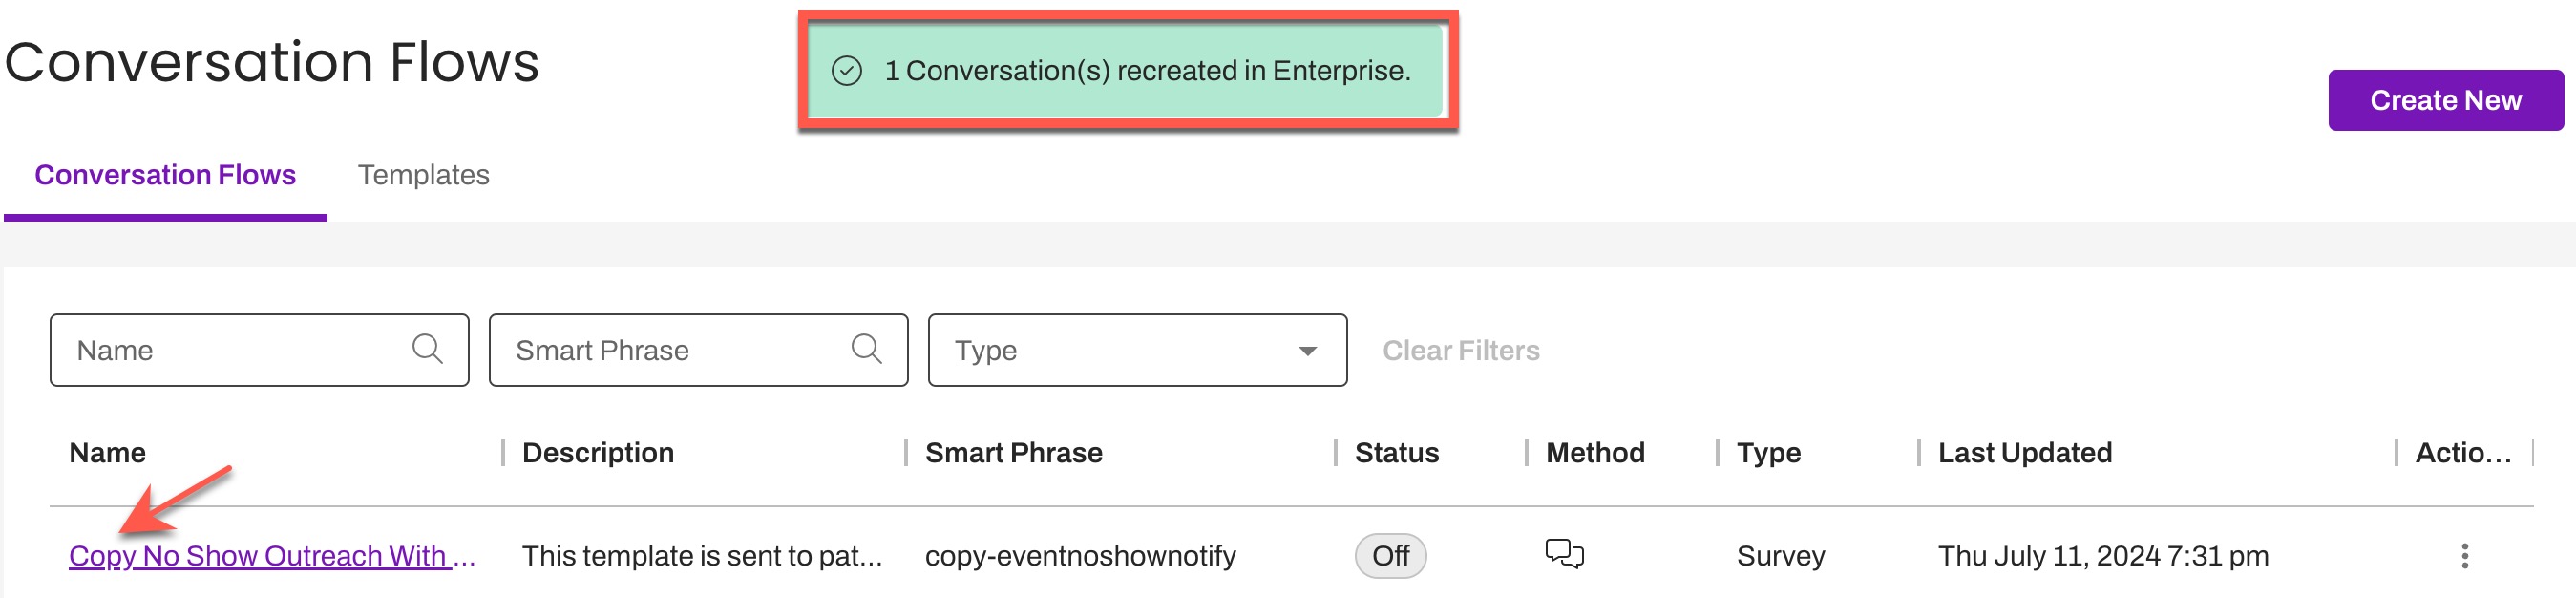
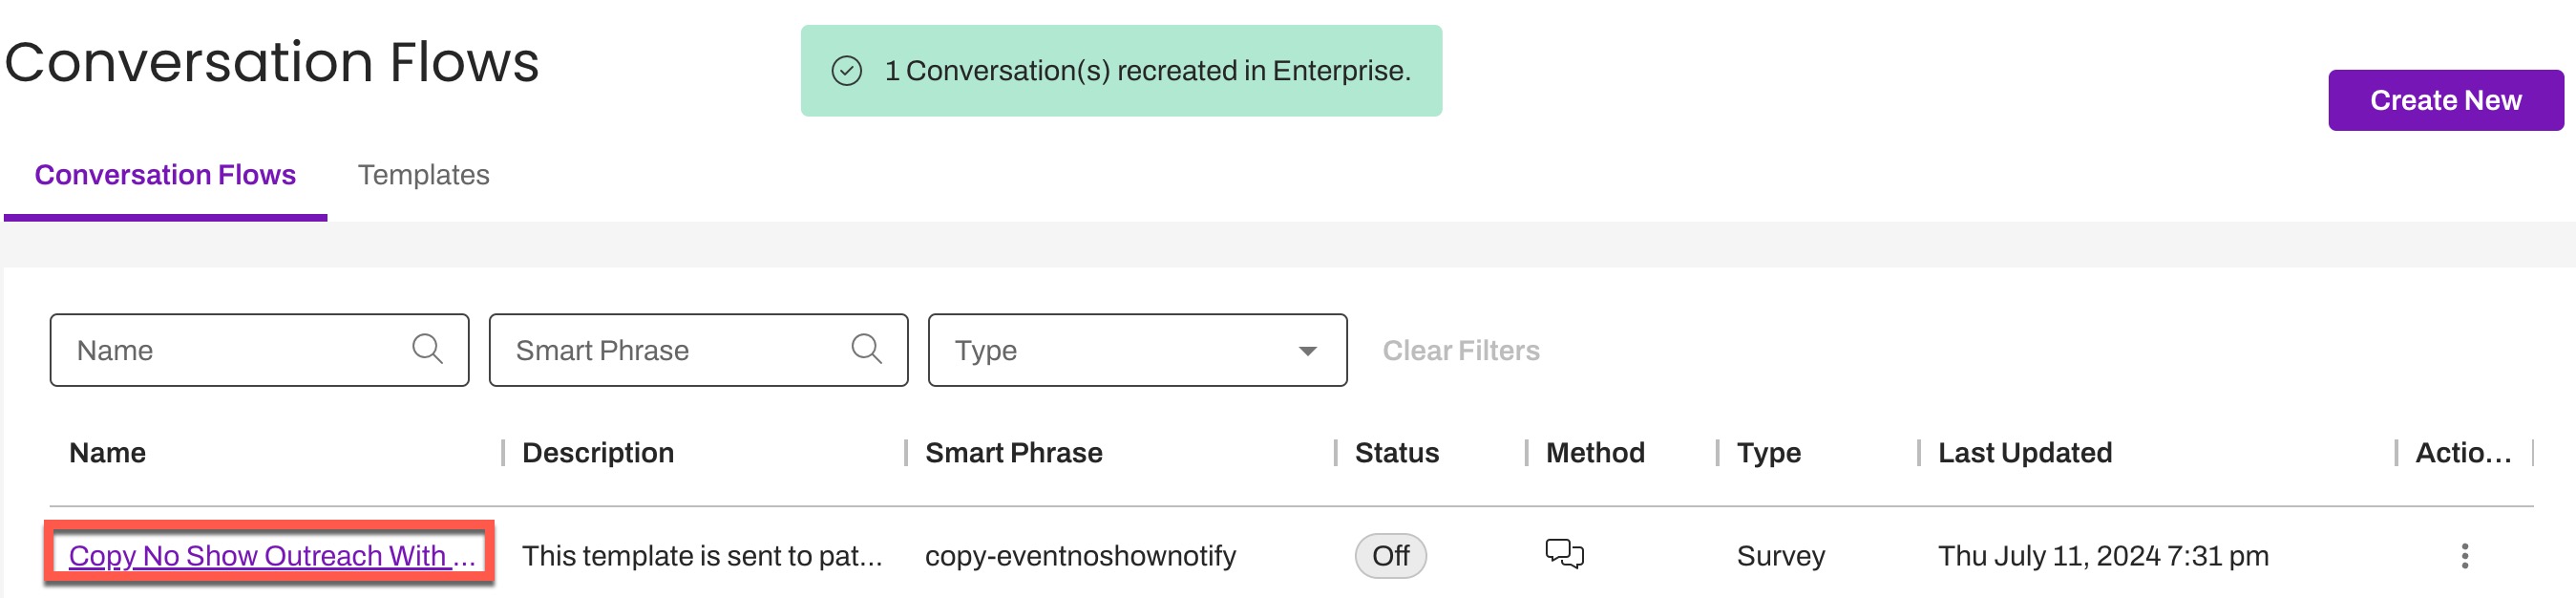
If the Template is successfully duplicated into your Enterprise, you will be redirected to the Conversation Flows page where a green success message will briefly appear. The copied Conversation Flow will have "Copy" prepended to its name and can be modified to fit your needs:
Edit the Copied Conversation Flow's Configuration
- Once the Conversation Flow has been duplicated, edit it as necessary. To do this, select the Conversation Flow's purple hyperlink:
- You will then be routed to the Builder view:
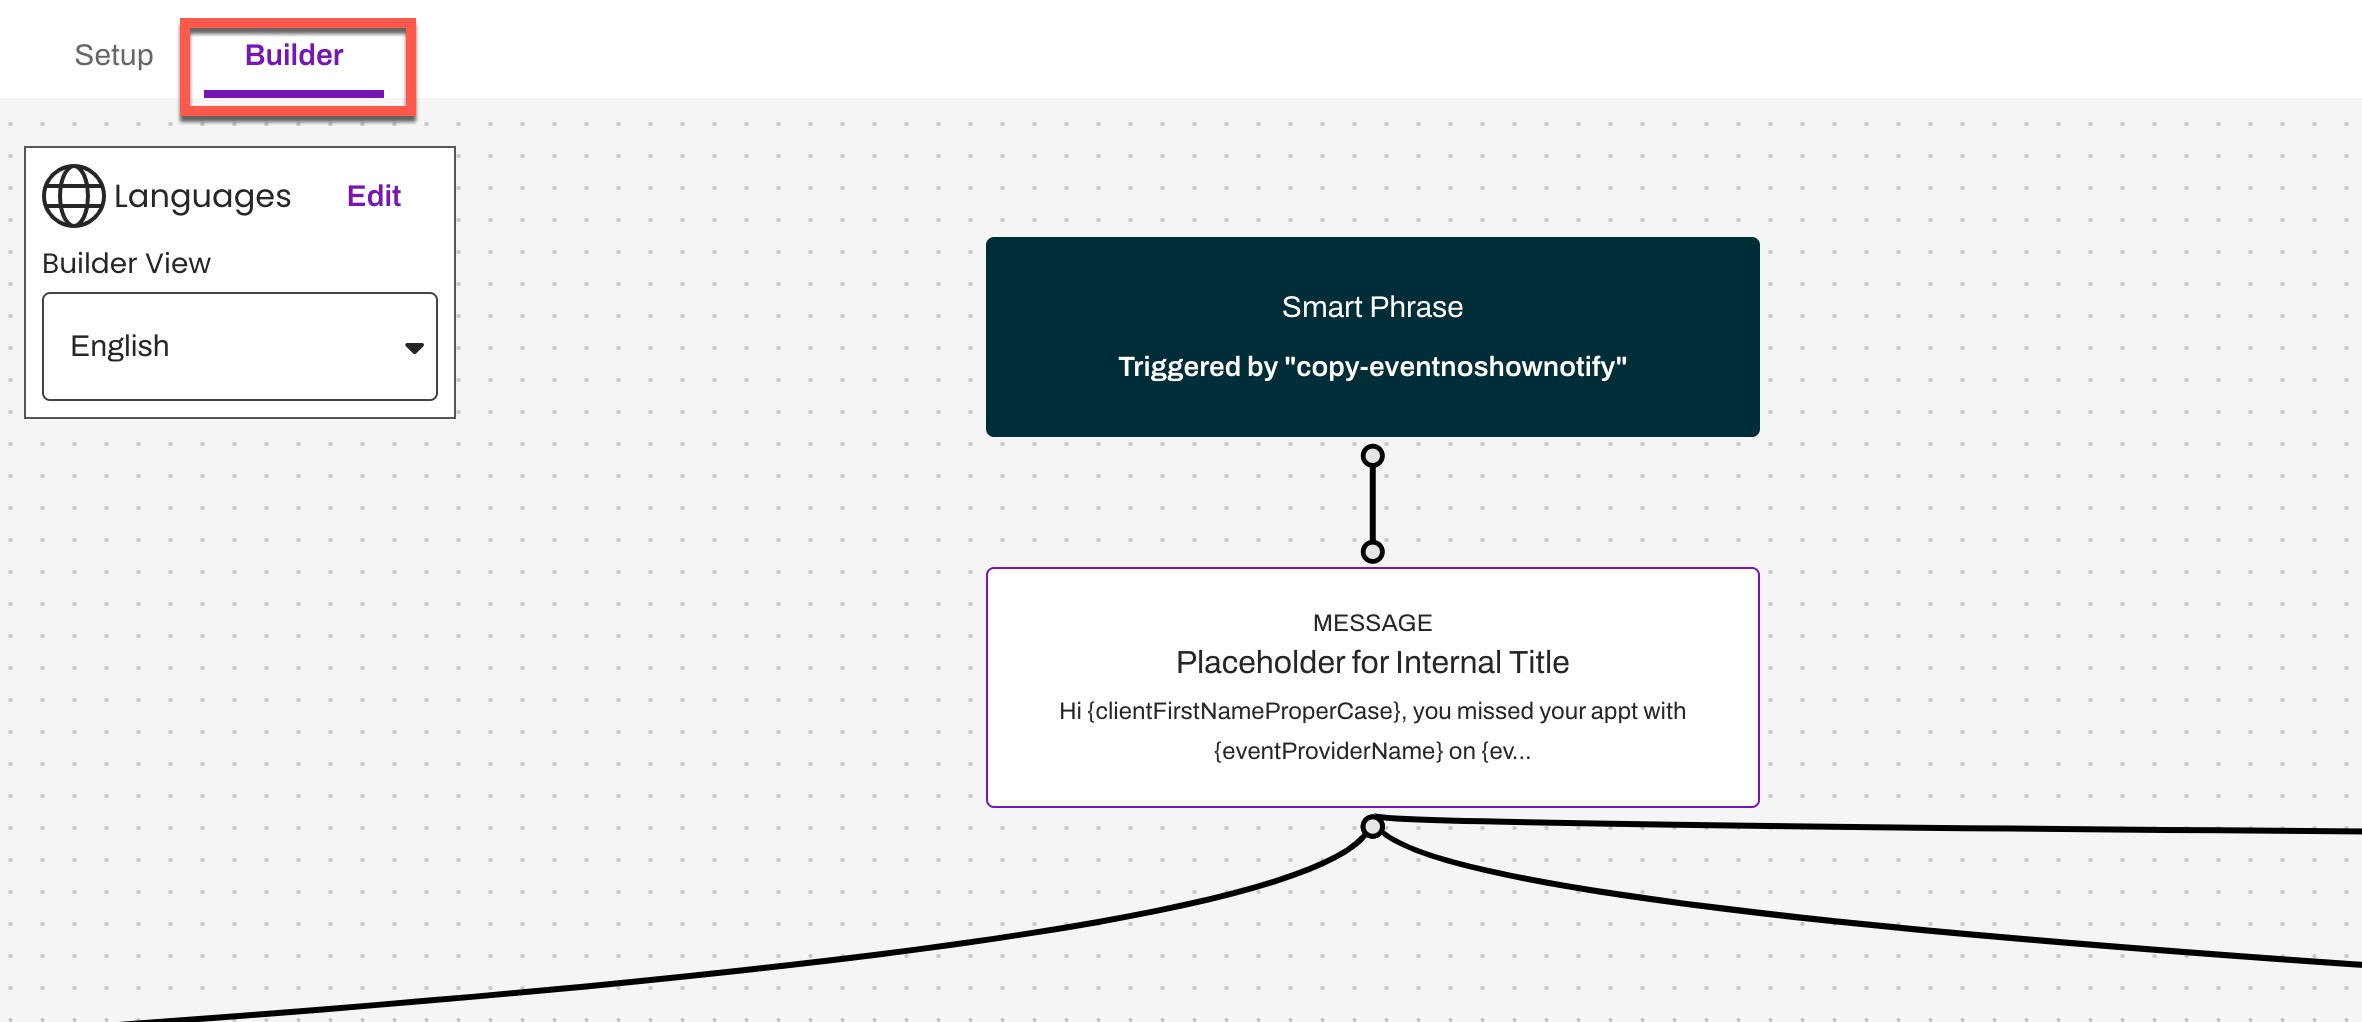
- Indicate the languages you would like to include in the Conversation Flow by navigating to the Languages menu. English and Spanish are supported.

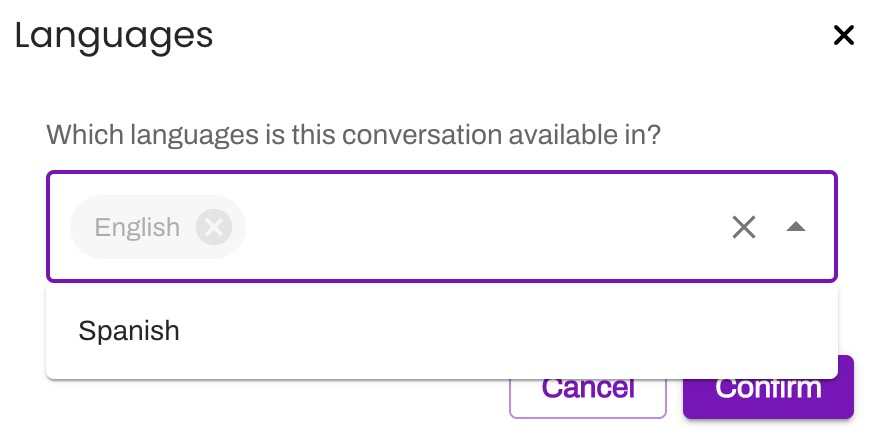
-
Select the Setup tab:
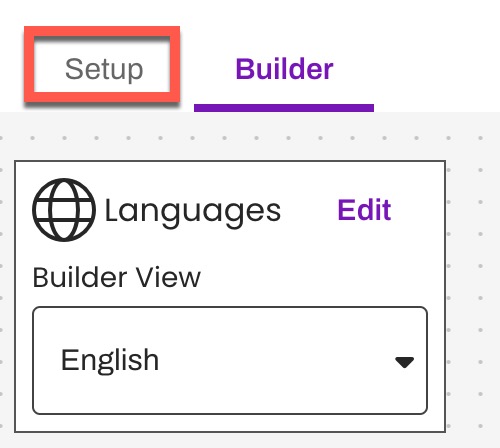
-
Modify the copied Setup to suit your organization's needs by following the steps below. Be sure to save the Setup once complete:

- Conversation Flow Name: Enter the display name for the Conversation Flow as it will appear on the Conversation Flows list page. Duplicated templates will have the word "Copy" prepended to the Conversation Flow Name, feel free to remove this.
- Description: Include a description of the intended use case and any relevant details you want to appear on the Conversation Flows List page.
-
Smart Phrase: Create a custom Smart Phrase (without spaces) that will be used to trigger the Conversation Flow. The same Smart Phrase can be used for SMS and voice versions of the Conversation Flow. Duplicated templates will have the word "Copy" prepended to the Smart Phrase, feel free to remove this.
- For Conversation Flows that include Event or Referral-based Smart Phrases, you must include either "Event" or "Referral" at the beginning of the trigger Smart Phrase.
- Timeout Minutes: Specify the time period that you would like the Conversation Flow to be open to responses from the patient before the session is terminated. This value applies individually to each message sent. NOTE: If an Artera user interrupts the Conversation Flow and sends a separate message to the patient, the Conversation Flow's session will end regardless of the Timeout Minutes set.
- Communication Methods: Determine whether you would like to create an SMS or voice Conversation Flow.
-
Channel Notifications: A Channel Notification must be selected for each new Conversation Flow.
Silent (default): All Conversation Flow messages to the patient and patient responses will display in the Patient Channel, however, responses from patients will not set the Patient Channel status to Open if is originally closed. NOTE: An Action to Open the Patient Channel, configured for a Patient Response, will override this setting.
Alert: All Conversation Flow messages to the patient will display in the Patient Channel and the Patient Channel will Open as new responses from patients are received.
NOTE: An Action to Close the Patient Channel, configured for a Patient Response, will override this setting.Hide Messages in Inbox: All Conversation Flow messages, except Internal Mentions and associated Event Messages, will be hidden from the Patient Channel and users will not be able to view the Conversation Flow messages to patients nor any patient responses. This is beneficial if a Conversation Flow incorporates a survey for which Artera users should not view patient responses for.
NOTE: We do not recommend selecting this option if a Conversation Flow includes a Mention Action. If this option is selected, the Mention will be added to the Patient's Channel but users would be missing the context from the Conversation Flow. If you wish to use this option and include a Mention Action in the Conversation Flow (for example, mention a user if a patient provides a 1 out of 10 survey response), ensure that the Mention includes full context so users are aware of what is needed.
Review Root Message and Patient Responses
Next, let's review how to edit the associated messages and Patient Response options. 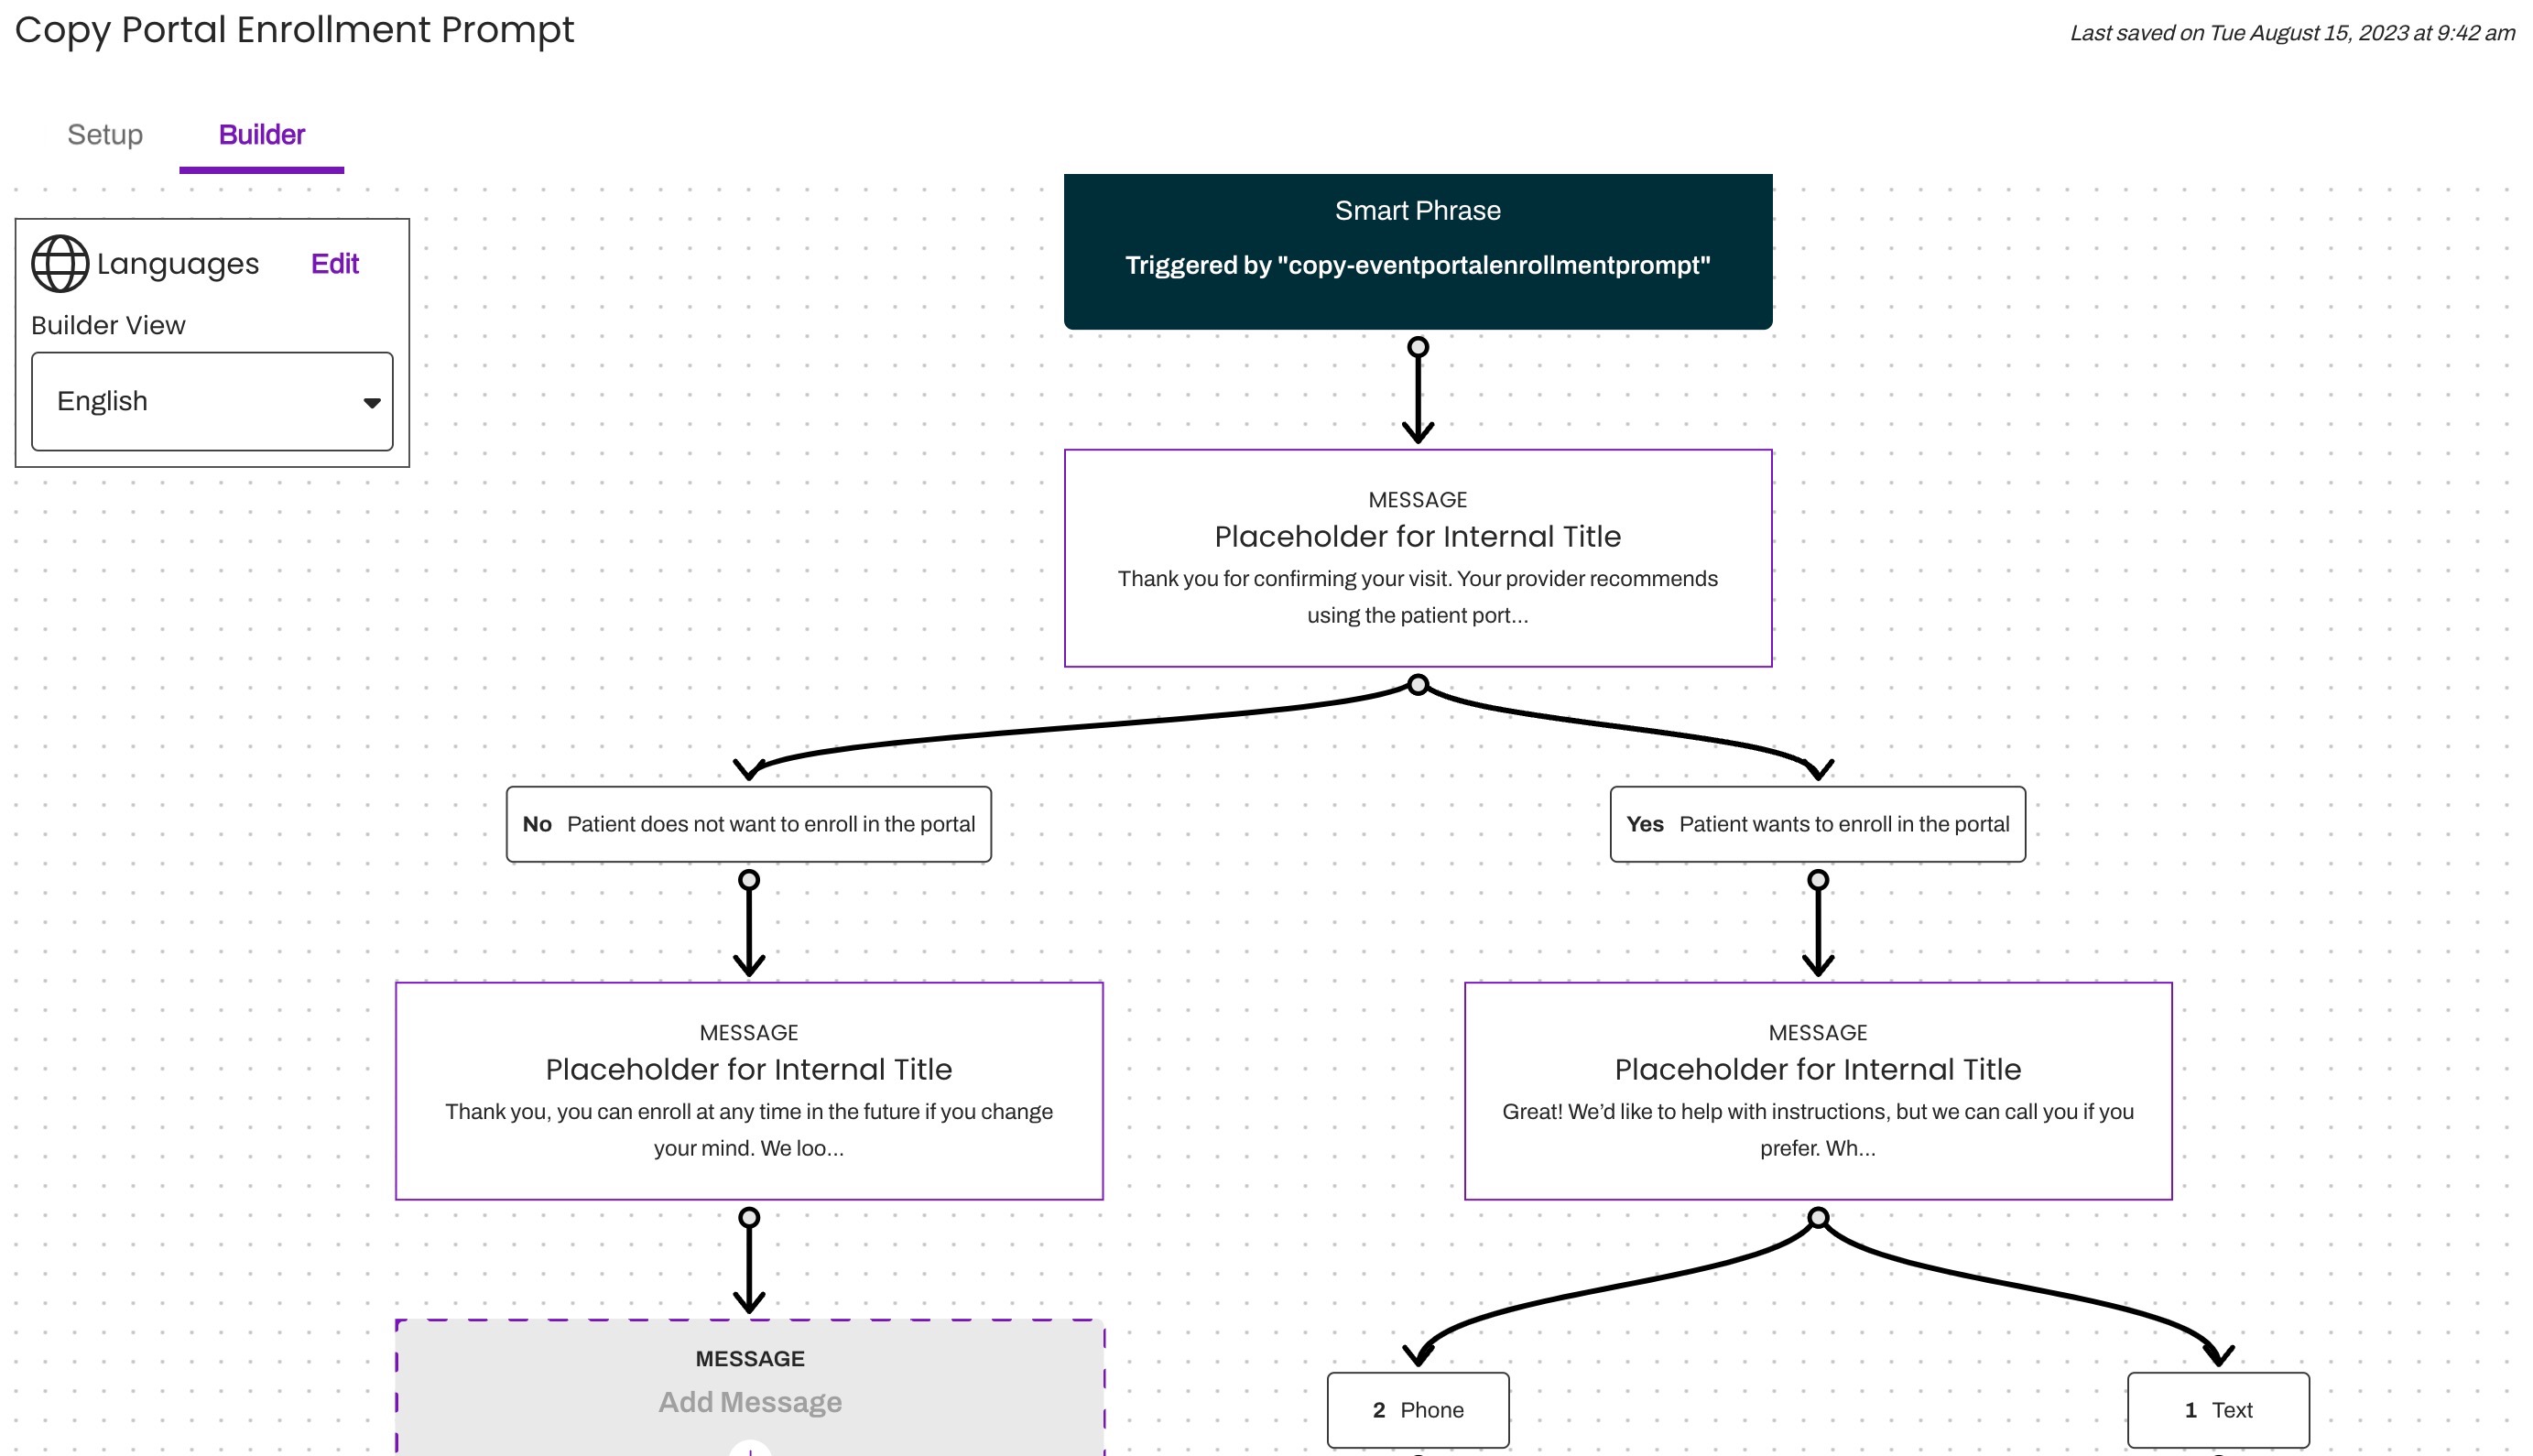
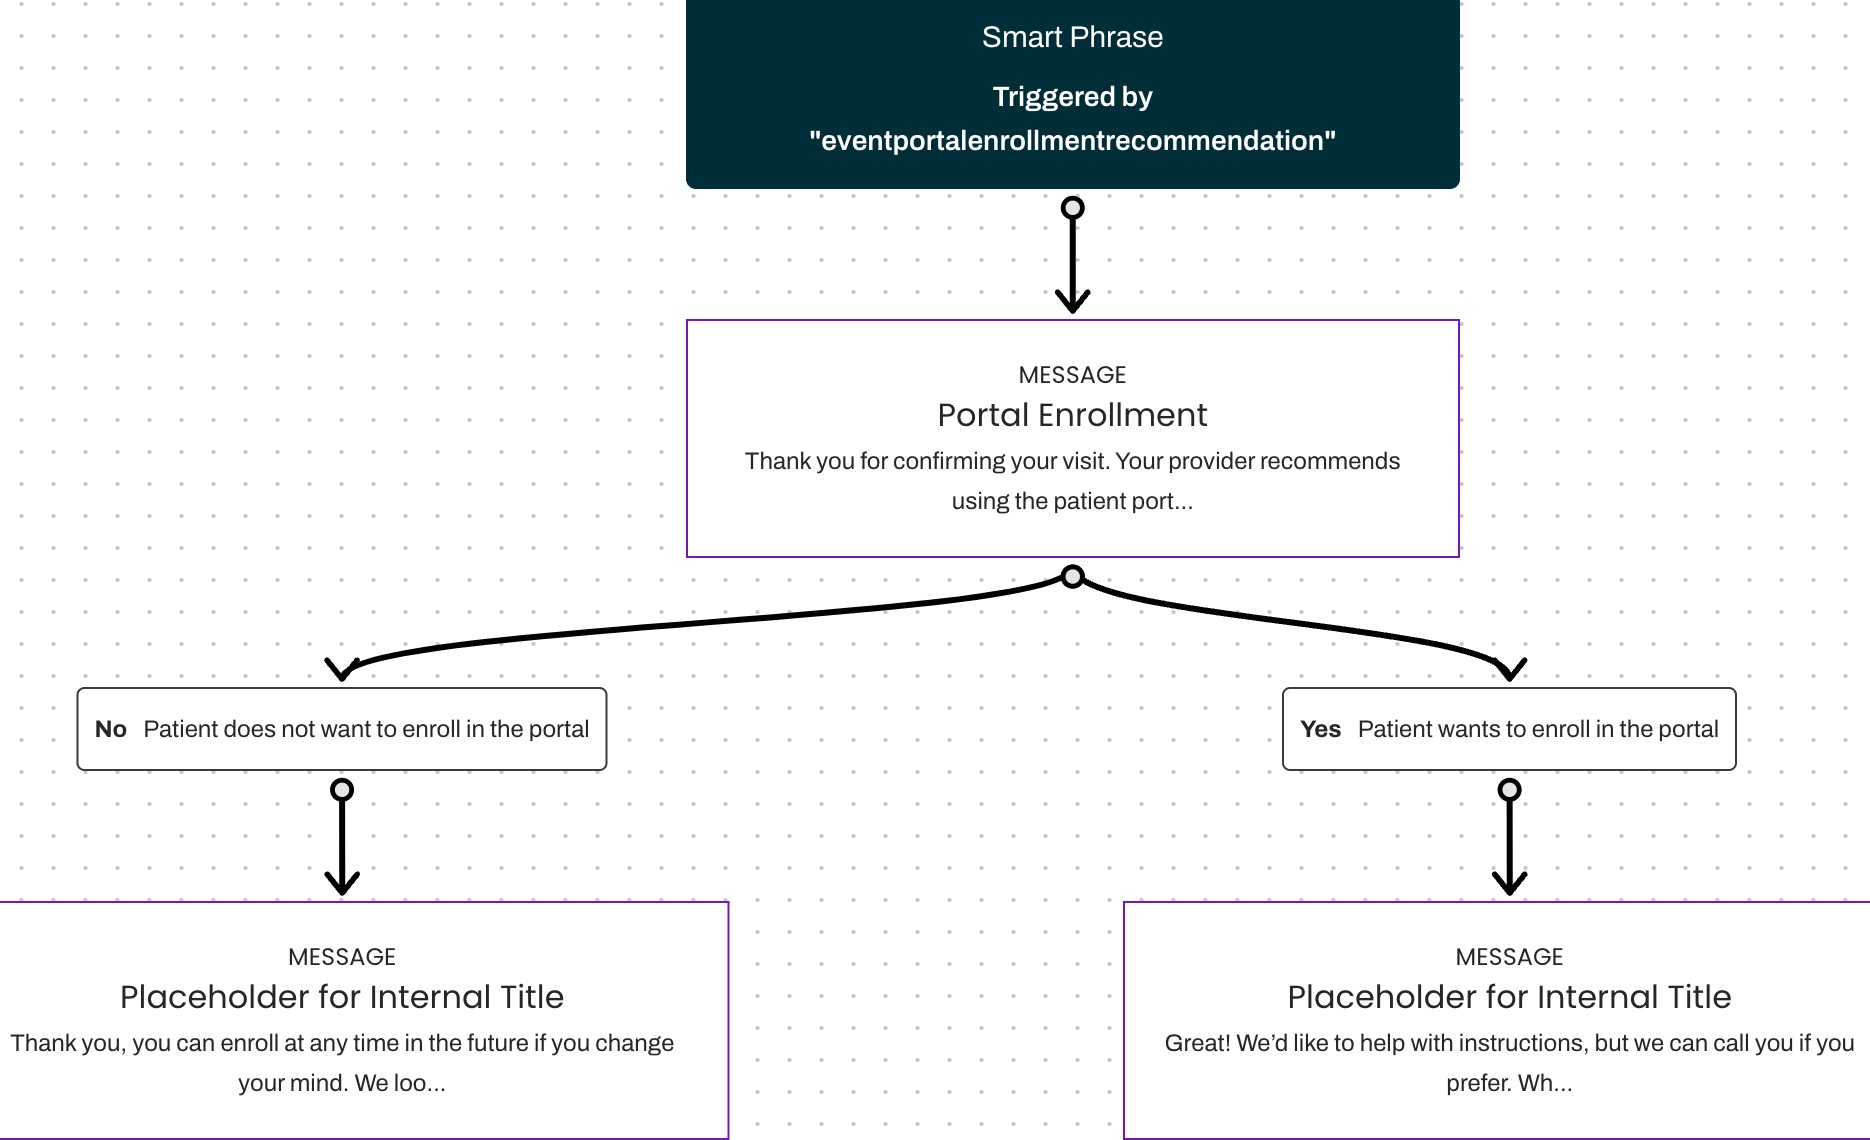
The first message placed beneath the dark teal Smart Phrase box is referred to as the Root Message. The Root Message initiates the Conversation Flow. From this message, you will add the branching scenarios based on Patient Responses.
- Select the Root Message from the diagram:

-
An Edit Message window will appear where you are presented with the following fields to modify. Once completed, select Update. NOTE: When creating Conversation Flows, the inclusion of Emojis are not supported throughout the build process.
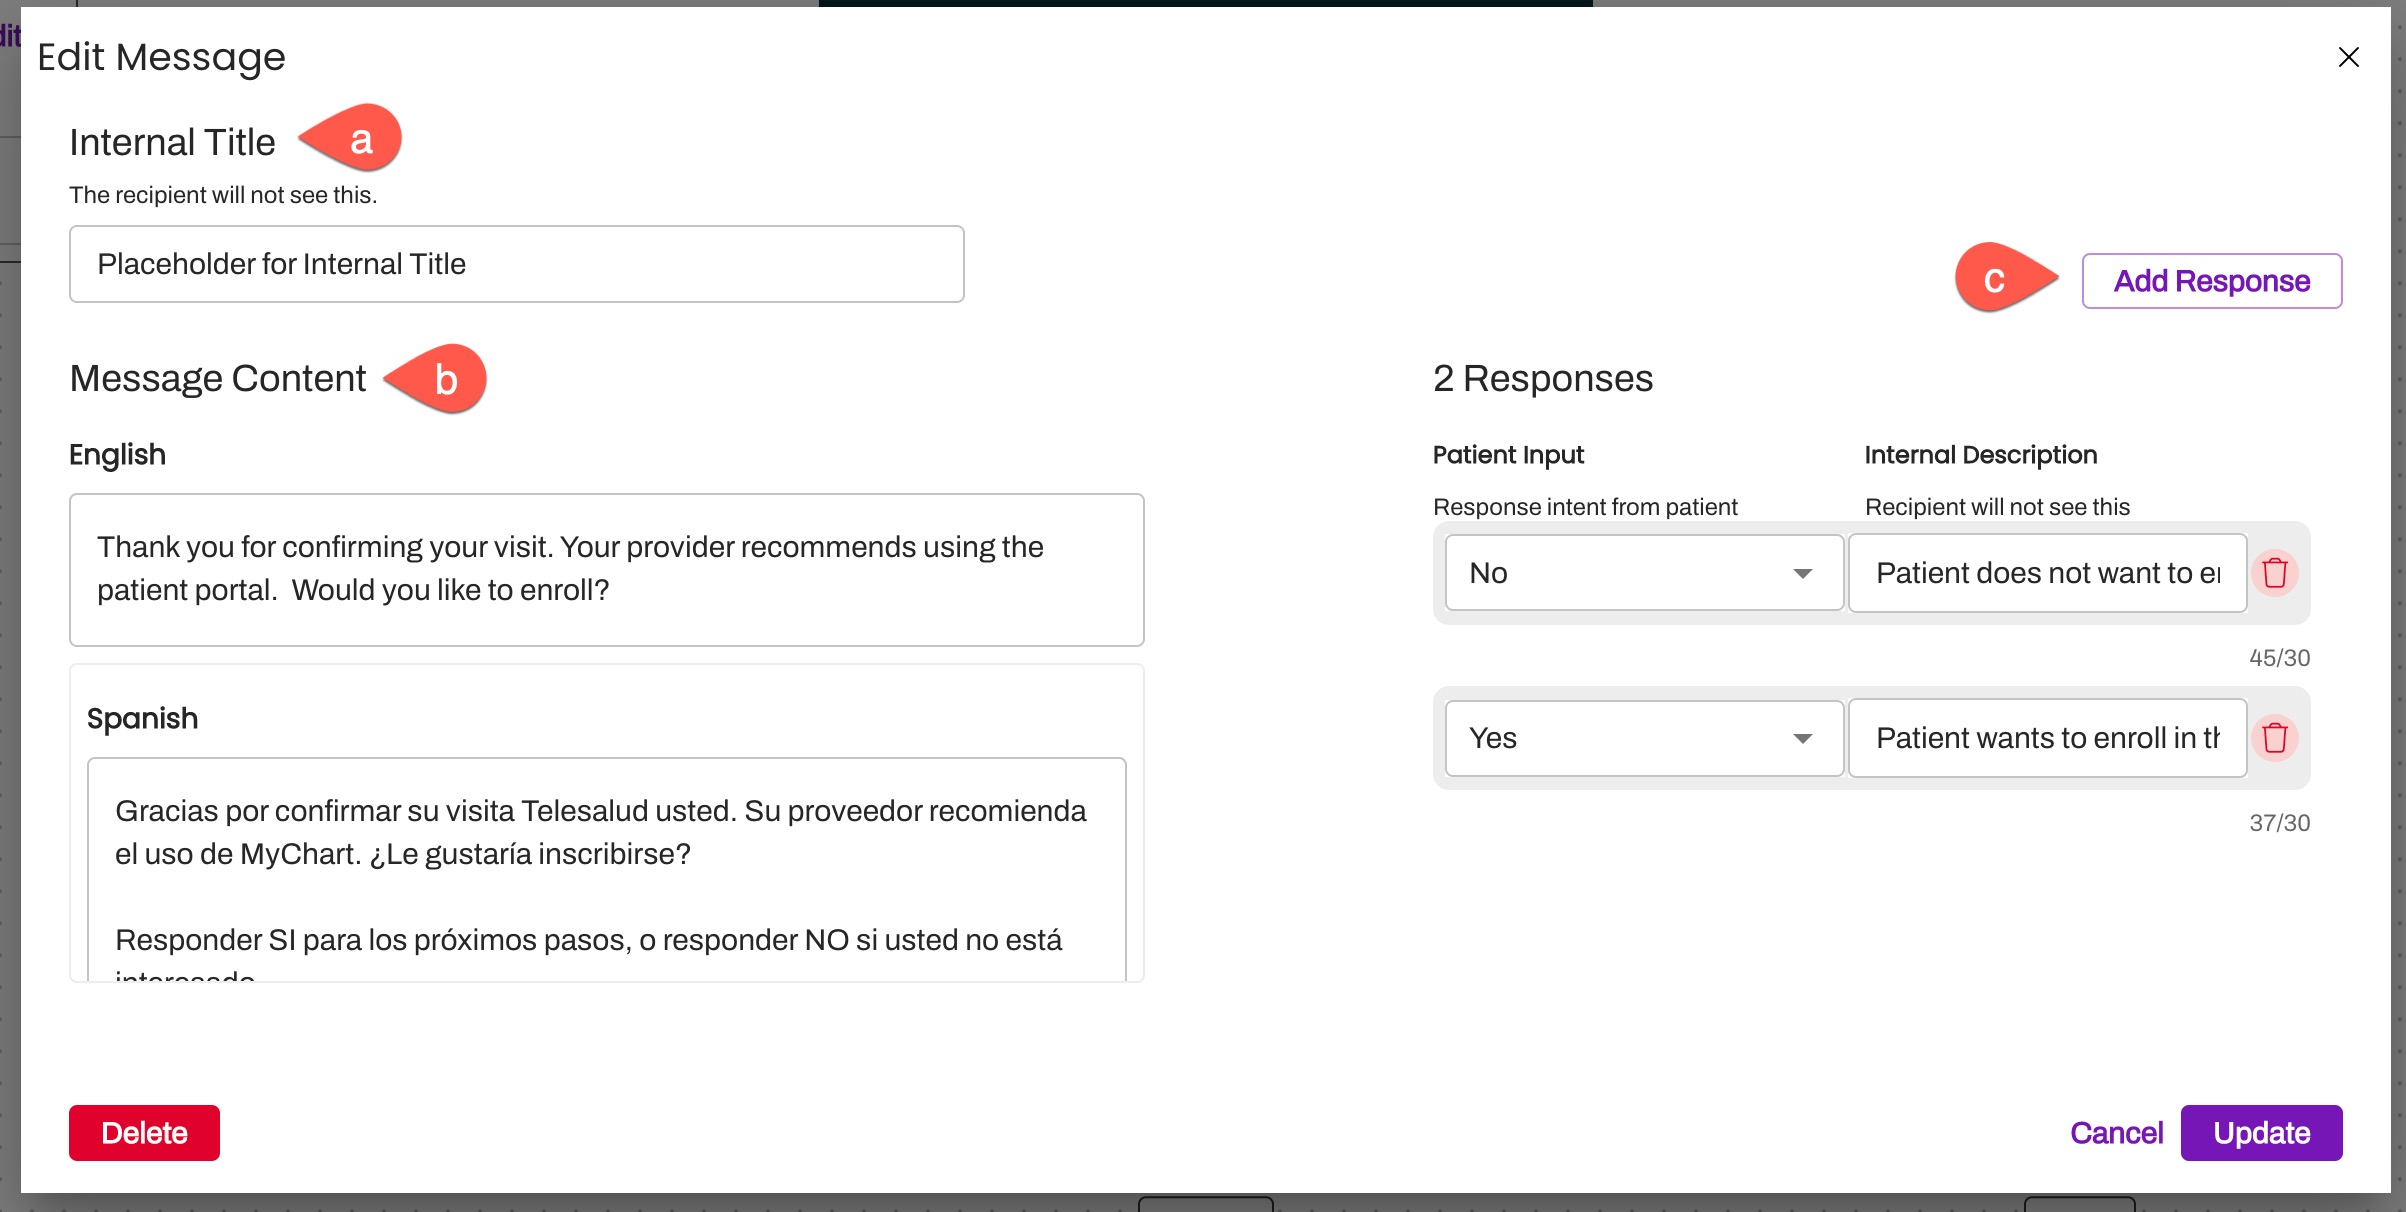
- Internal Title: An internal-facing label associated with the Conversation Flow to provide easier search and identification of Conversation Flows.
- Message Content: This is the first message (Root Message) the patient will receive. Be sure to include the ask of the patient and expected responses. If you are including a Spanish translation, insert the Spanish verbiage of the message within the Spanish field.
-
Next, you will populate the Patient Responses based on the message. You will need to define one or more Patient Responses within your outbound message. These create the parameters for the patient's reply and allow you to define the proper branch of the Conversation Flow the patient should receive next. Click Add Response.
-
Patient Input - Use the drop-down menu to select the response value. The following response options are available for selection:
- 0-10: In situations where the patient has more than two options, we recommend using numbers for the Patient Response options.
- True, False
- Yes, No: In situations where the patient only has two response options, we often recommend choosing the Yes and No response options.
- Low, Medium, High
- Small, Large
- Unrecognized Response
- Internal Description - Enter the associated message you want to appear in the Patient Channel for your staff to review. These messages will help give context to staff when they are reviewing the Conversation Flow's history.
-
Patient Input - Use the drop-down menu to select the response value. The following response options are available for selection:
- Once updated, the Conversation Flow will reflect your updated Root Message and possible branches based on a patient's response:
Add Actions and Follow-Up Messages
Process Steps
Continue building out the Conversation Flow by adding messages and Actions to each of these Patient Responses. Actions can be added to individual Patient Responses to automate the appropriate next step that should be taken based on the patient's response. Each Patient Response can have up to 9 related actions allowing you to automate multiple actions with a single response.
Click here to learn about the available system-defined actions.
-
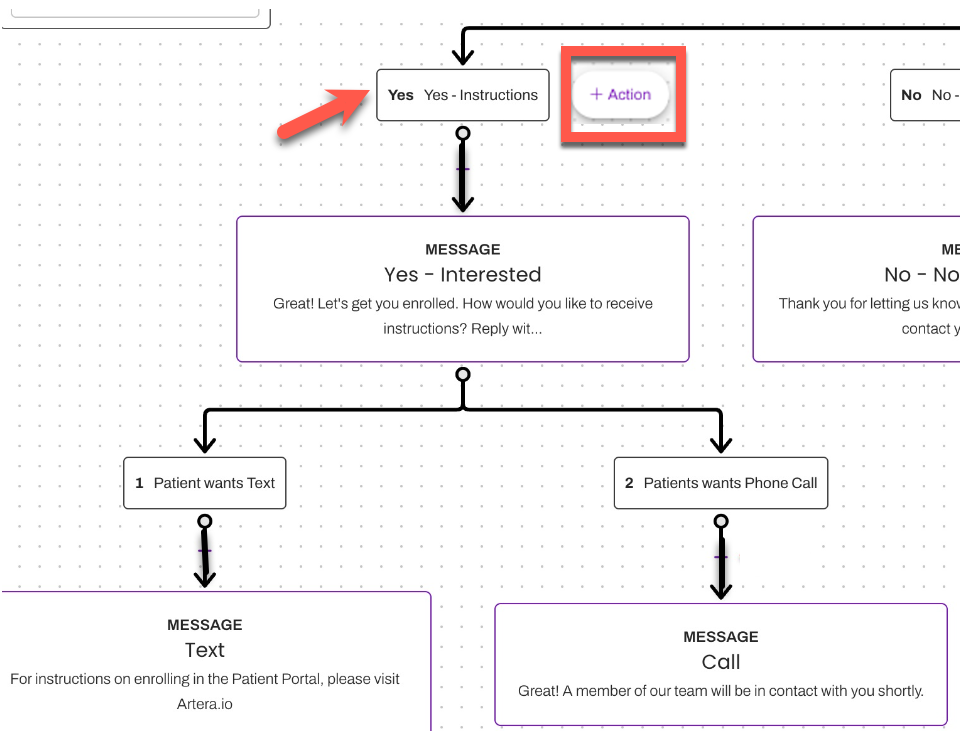
To add an Action to a Patient Response, hover over the Patient Response you wish to add an Action for and select the + Action button that will appear:
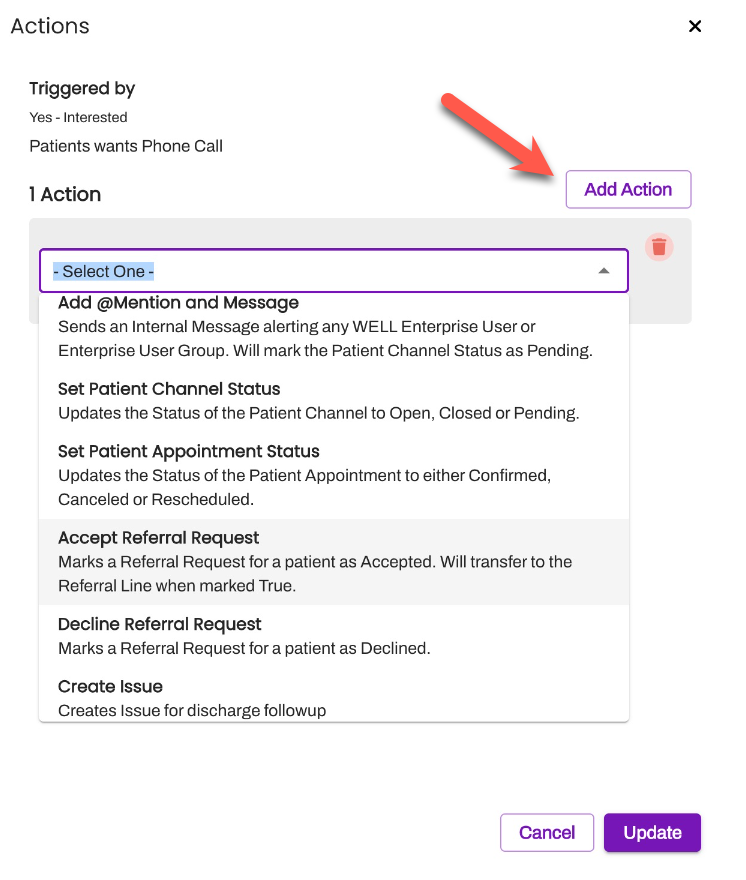
- Select Add Action to choose the appropriate Action from the drop-down menu. The function of each Action is defined here:
- We can see here that an Action has been added to the Patient's Response:

- Continue reviewing and adding messages and Actions based on the Patient Responses.
-
Once all information has been entered and validated, select Save in the upper right corner to save the updated Conversation Flow:

Set Conversation Flow to On
You will need to update the status of your copied Conversation Flow from Off to On.
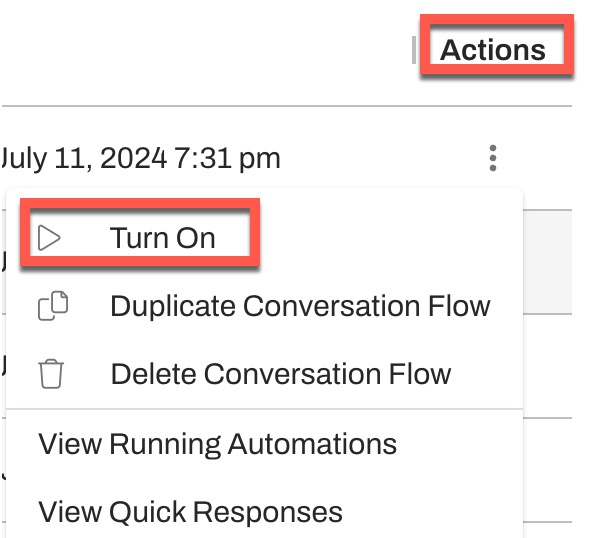
- Locate the Conversation Flow in the Conversation Flows List page. Use the (...) Actions menu to select Turn On:
- Your Conversation Flow Status will update from Off to On:
- Finally, enable your Conversation Flow by following these instructions to insert your Conversation Flow's Smart Phrase into one of the patient outreach options.